Labels
Change the words your portal uses, so it says job, request or claim instead of record.
Overview
Out of the box a portal talks about records. The button says "New", the delete prompt asks "Delete record?", and an empty table reads "No records to display."
That is fine until your portal is about something specific. A maintenance portal is about jobs. A claims portal is about claims. A recruitment portal is about applications. Your users have a word for the thing they are looking at, and it is not "record".
The Labels tab lets you set that word once per page. Everything else follows from it.
The record name does most of the work
Set what one row is called and the portal rewrites itself around it. Set it to "job" and:
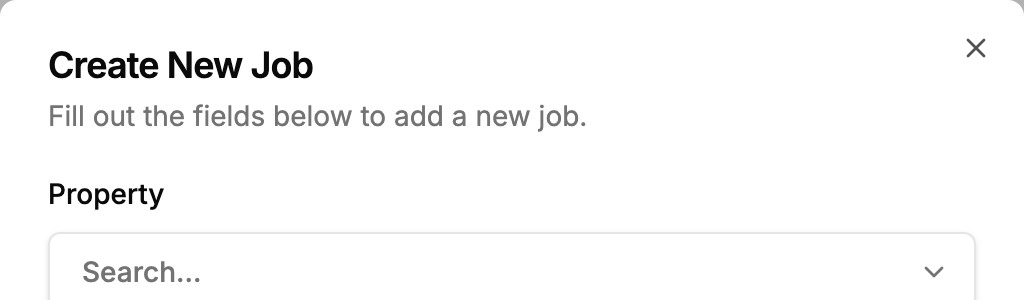
- "Create New Record" becomes "Create New Job"
- "Delete record?" becomes "Delete job?"
- "Record deleted" becomes "Job deleted"
- "No records to display." becomes "No jobs to display."
- The view, edit and delete buttons on each row announce themselves to screen readers as "View job", "Edit job" and "Delete job"
You set the singular and the plural separately, because English is inconsistent. Type the singular and we fill the plural in with an "s" on the end, which is right for jobs and requests and wrong for boxes, people and entries. It goes in the box next to it so you can see it and change it.
Setting your labels
- 1
Open the table's Labels tab
In the portal admin, open the role you want to configure and open the table's page. Switch to the "Labels" tab, the last of the four after "Access", "Fields" and "Display".
- 2
Name the page
Fill in "Page name" with what this table should be called in the portal. It changes the sidebar entry, the card on the launcher screen, the heading on the page and the trail above a record, all together. Leave it empty and the portal uses your Airtable table name, which is the behaviour you had before.
"Page description" is the line underneath that heading, and underneath the title on the launcher card. Leave it empty to use your Airtable table description, or leave both empty for no description at all.
This is the pair to reach for when the Airtable table name is one your team or your automations depend on, so renaming it at source is not an option.
- 3
Set what one row is called
Fill in "One record is called" with your word, in lower case, as you would write it mid-sentence: job, request, claim, application. Check the plural we filled in next to it and correct it if it is wrong.
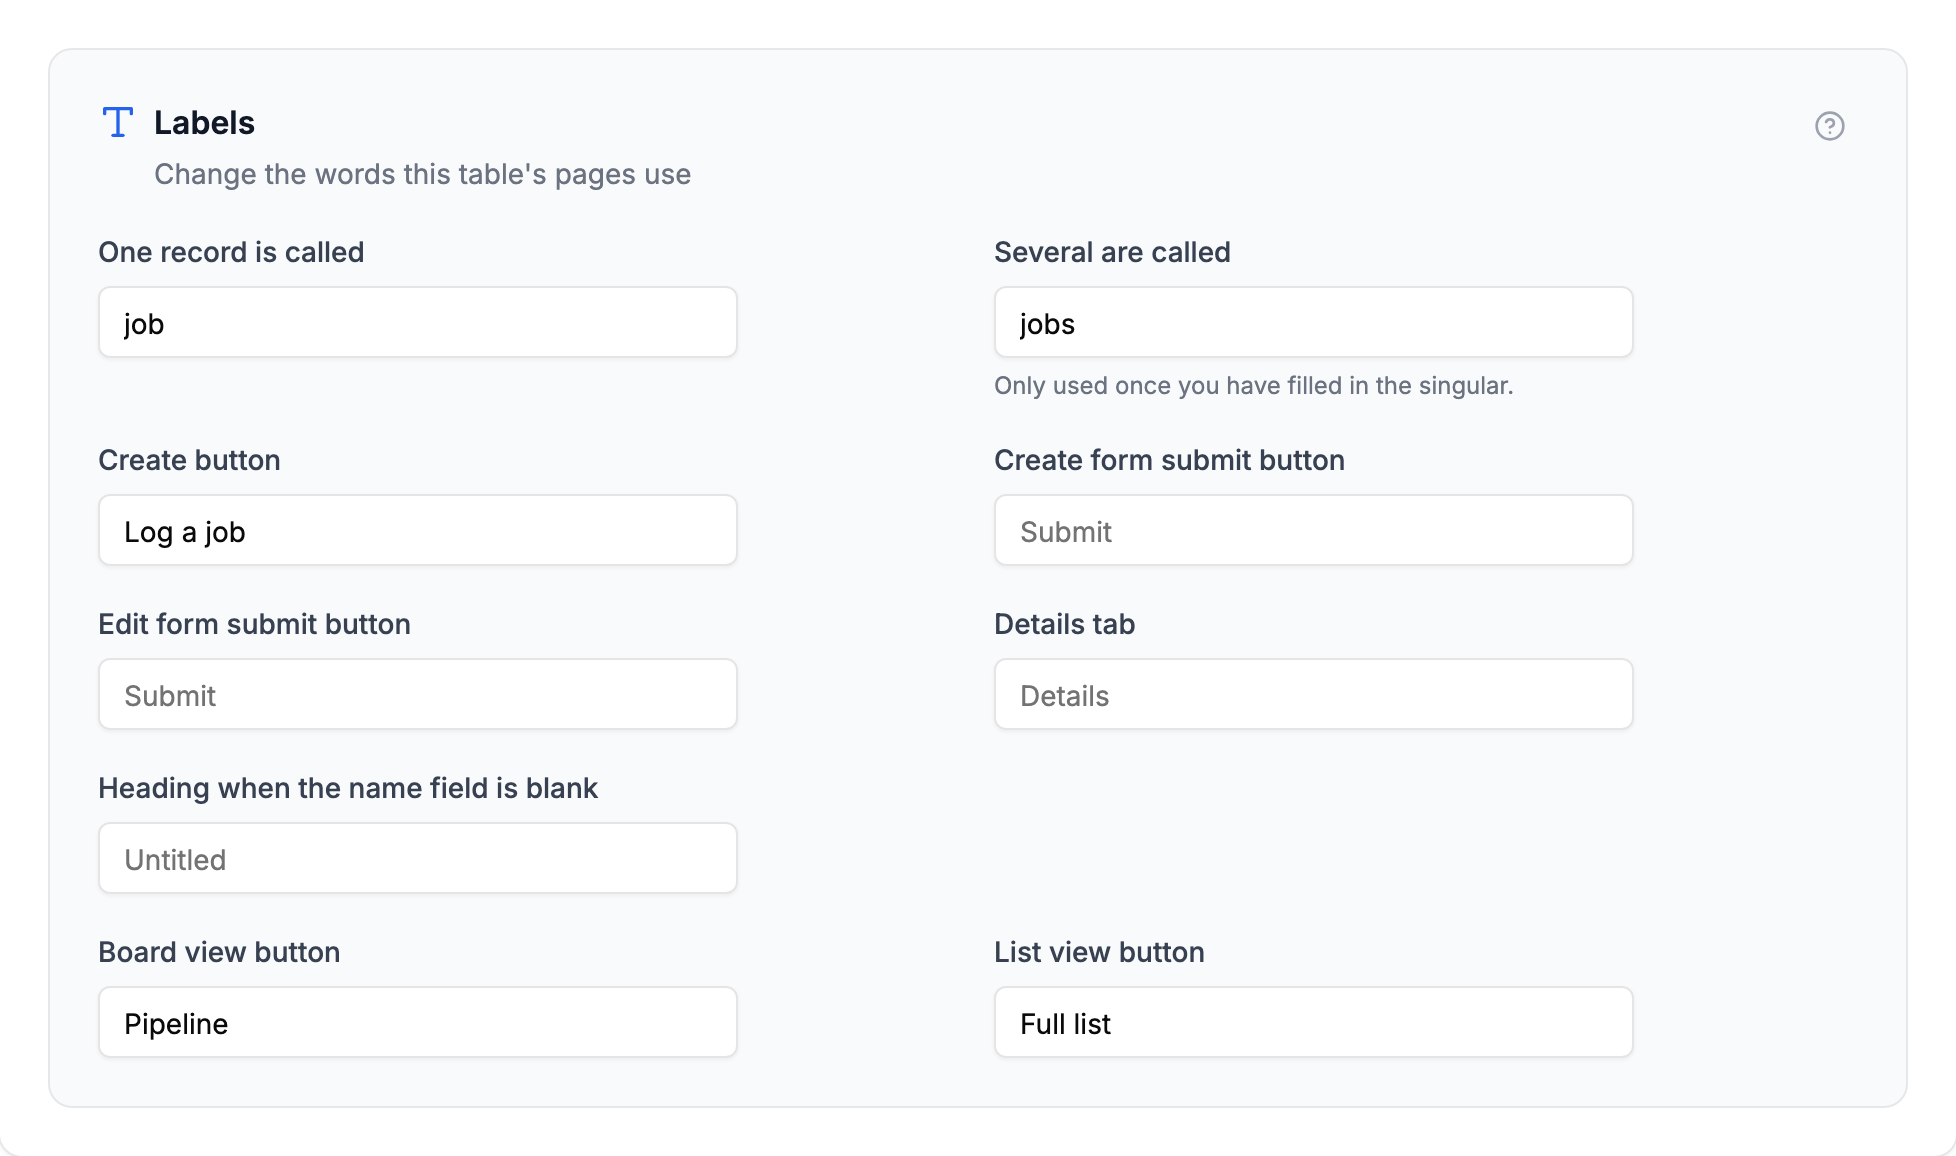
The Labels tab on a kanban table. Boxes you have filled in show in black; the greyed-out text is the wording the portal will use if you leave a box empty. - 4
Change any individual buttons
The rest of the boxes are optional. The create button, the two form submit buttons, the "Details" tab name and the heading shown when a record has no name can each be set on their own.
- 5
Save
Press Save. Changes appear in the portal on the next page load.
What your users see
Before, on a maintenance portal whose rows are jobs. The button says "New" and the view switcher says "Kanban" and "List".

After, with one word set. The record name is "job", the create button is "Log a job", and the switcher reads "Pipeline" and "Full list".

The record name reaches further than the buttons you can see. Opening the create form on that table now reads:
What the greyed-out text means
Every box is optional, and the greyed-out text inside an empty box is what your portal will actually use. Leave a box empty and you get that. Clear a box you have filled in and it goes back to it.
That means you only ever fill in the boxes you want to change, and you can always see what you are getting.
The plural is the one exception. Because the wording has to stay consistent, clearing it just refills it from the singular on the next save. If you need something irregular, type it in rather than clearing it.
Calendar and kanban view buttons
Calendar and kanban tables let your end users switch how they see the records, and those buttons have their own labels.
On a calendar table you get Month view button, Week view button, List view button and Jump to today button. On a kanban table you get Board view button and List view button. You will only see the boxes for the view your table actually uses, because the table and gallery views have no switcher at all. If you switch a table from one view to another, anything you named for the old view is kept but stops applying, and comes back if you switch the table back. The List view button is the exception: both the calendar and the kanban have one, so a name you give it follows the table across that switch.
This is where the "List" button gets renamed. If your calendar is a schedule of visits, "Agenda" or "All visits" usually reads better than "List".

Renaming these changes the words only. The buttons still do what they did, and the back and forward arrows either side of the calendar still describe the dates they move through to a screen reader ("Previous month" and "Next month" in month view, "Previous week" and "Next week" in week view) rather than the name you have given the view.
Labels and the Profile page
The profile page is a table like any other, so it has its own Labels tab. Open the table with the person icon and set its labels there.
"Page name" is the exception. The profile page's own heading and its sidebar entry are portal-wide wording, so they are set under Portal chrome rather than here. "Page name" on the person table names the separate directory page you get if you turn that table on as a page of its own, which is a different page onto the same people.
Labels and roles
Labels are set per role, like the rest of a page's settings, so different roles can use different wording if that suits your portal.
Most portals want one set of wording for everyone, so labels you set on the Default role are used by every other role automatically. You only need to open another role's Labels tab if you want that role to say something different. When a role is inheriting, the Default role's wording shows as the greyed-out text, so you can see what that role will say.
The rest of your portal's words
Everything above is about what your records are called, and that is set per page. The words around them are set once for the whole portal, on the Labels tab in your portal's settings, organised into sections: the sign-in screen, sign-up and registration, navigation and account, filters, search and sorting, record actions and forms, fields and attachments, loading, empty and error states, the calendar, kanban and FAQ views, and the cookie prompt shown when you track your portal.
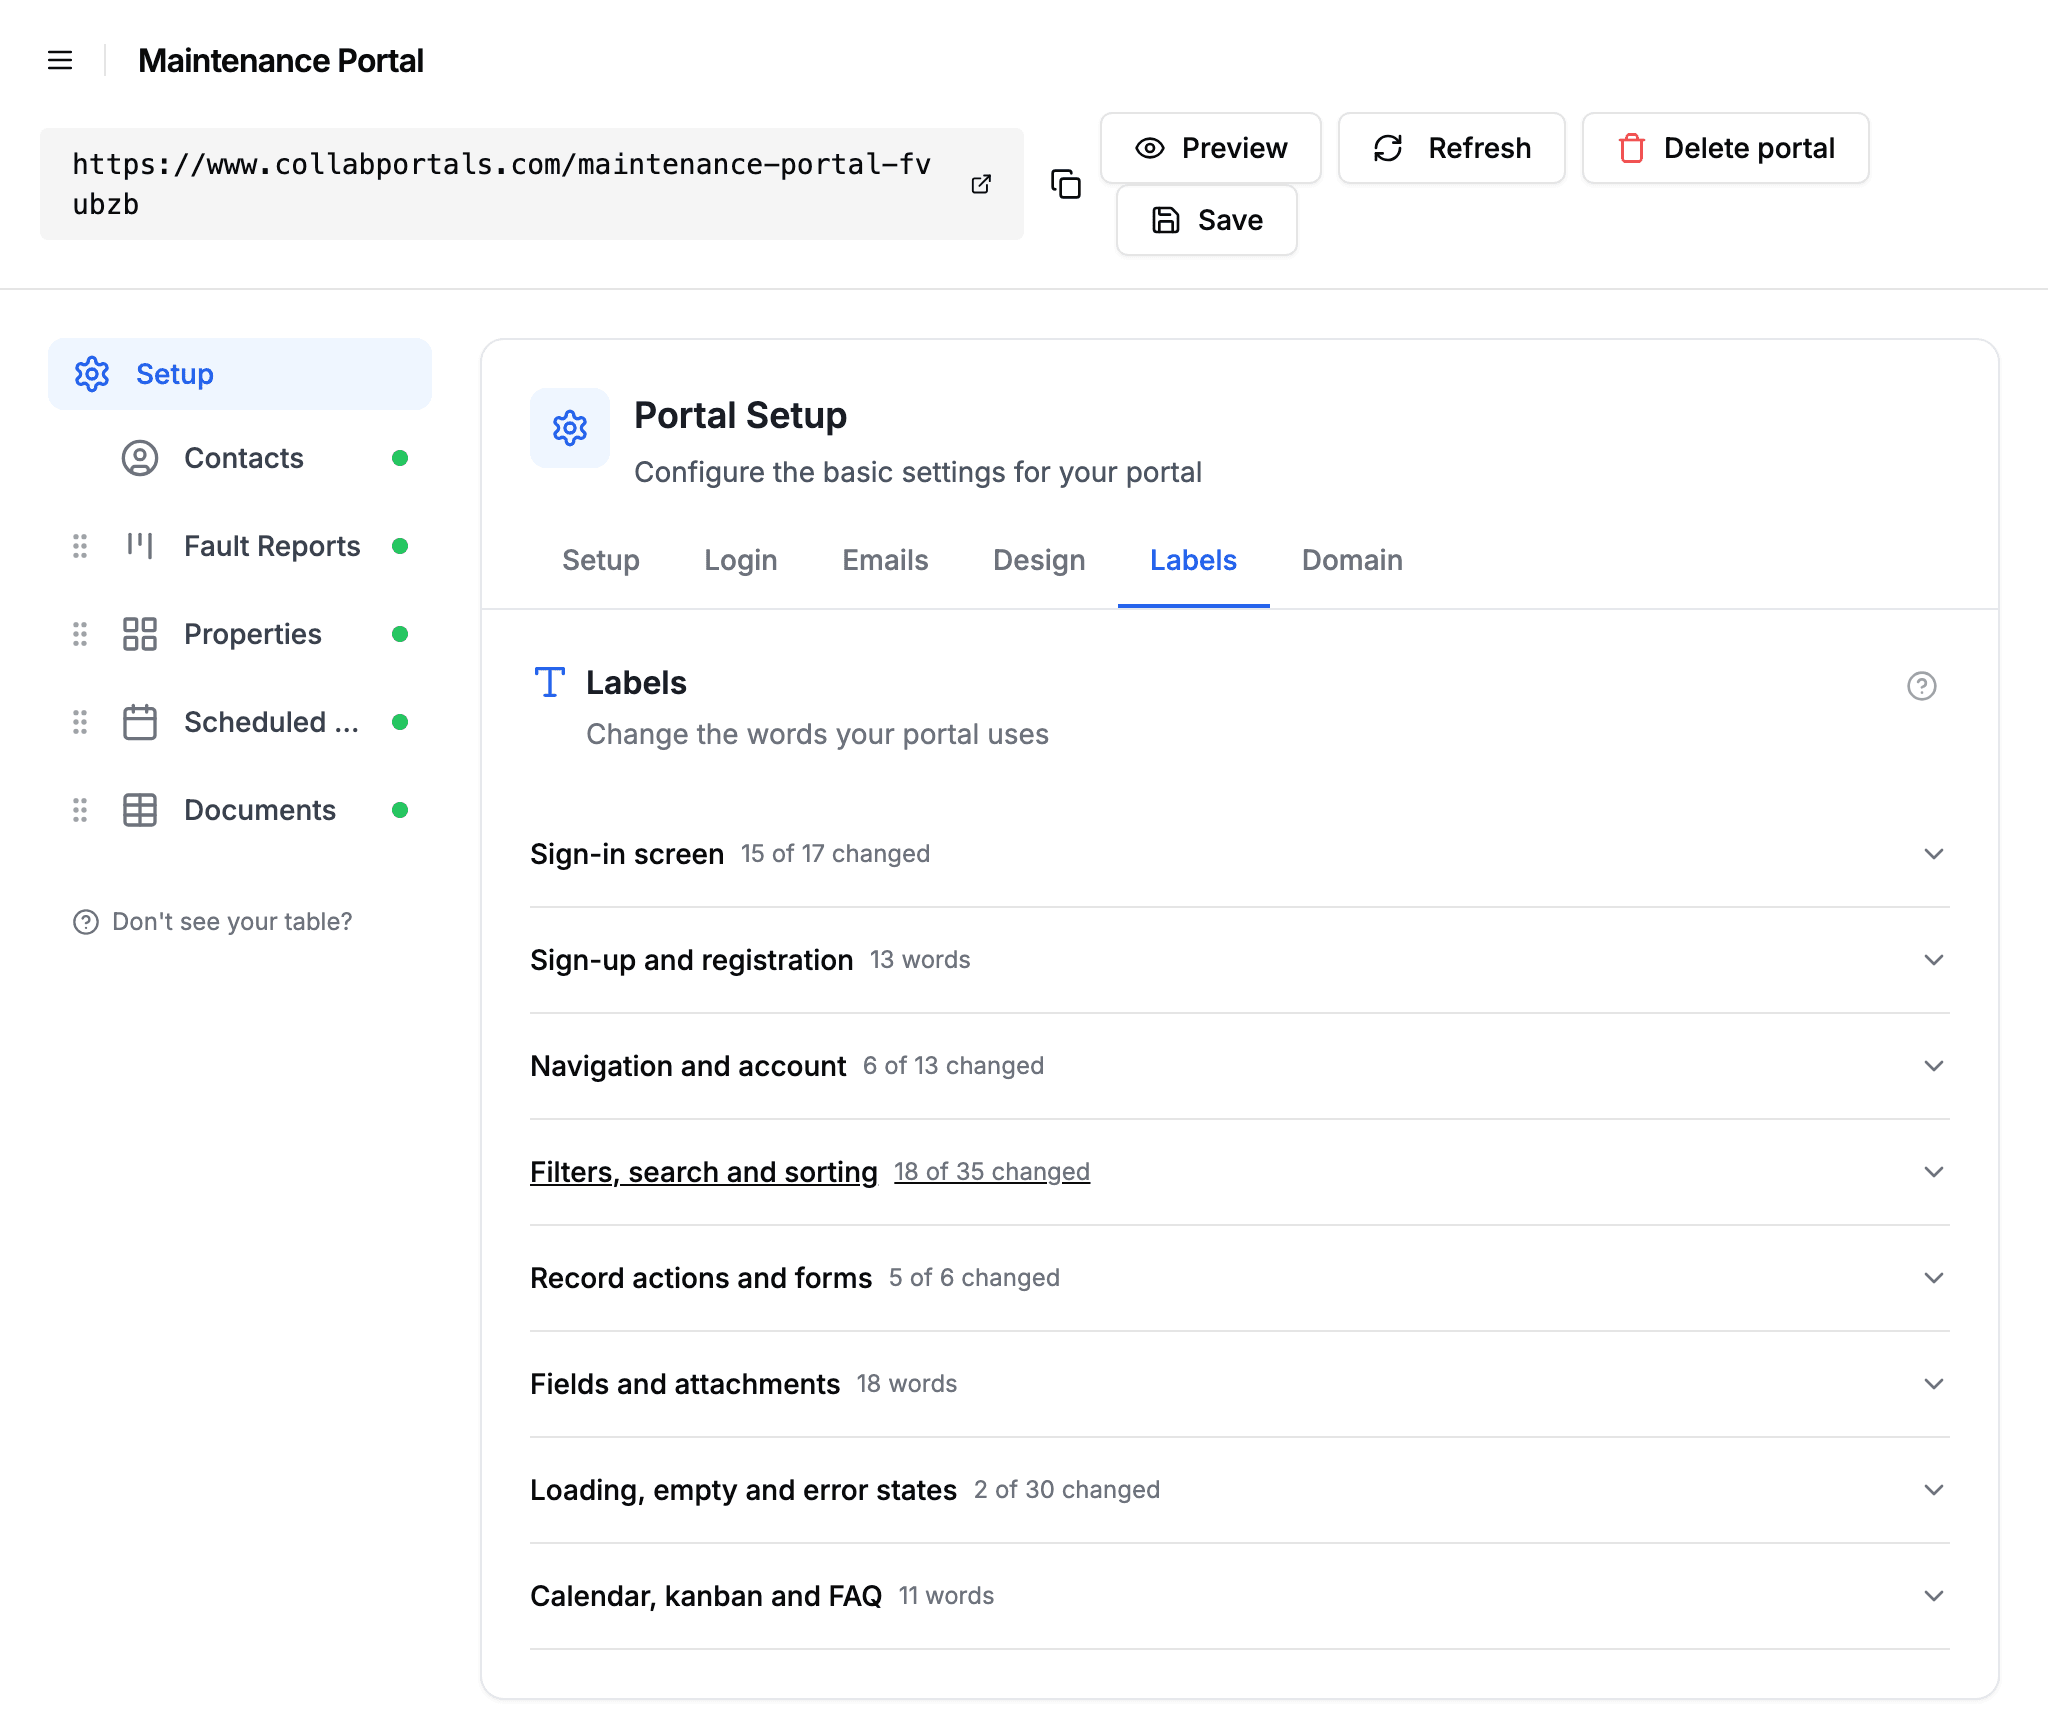
It works the same way. Every box is optional, the greyed-out text is what your portal says if you leave it empty, and clearing a box puts it back.
Some boxes mention something in curly brackets, like {count} or {field}. That is where a number or a name gets filled in, so "Show more" becomes "Show 3 more". Leave it out if your wording does not need it.
The login code email is on the Emails tab rather than the Labels tab, next to the subject and intro line, so you can write the whole email in one place.
If you are translating your portal, this is the tab that does most of the work.
Translating your portal
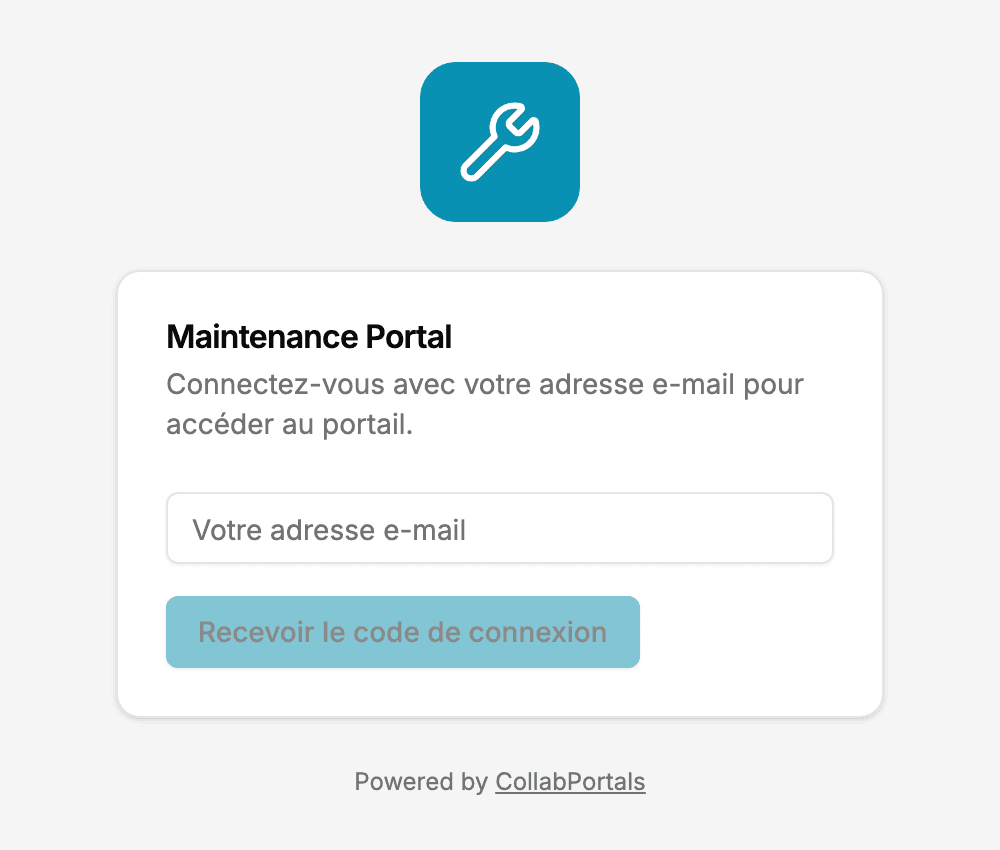
Labels were built for swapping one word for another, but because almost every string your users read has a box, they also cover the case where every word needs to change: a portal that runs in French, German, Spanish, or any other language.
The work splits three ways:
- 1
Translate the portal's own words
On the portal-level Labels tab, work through the sections in order. Start with the sign-in screen, because it is the first thing your users see, then navigation, then the filters and record sections. Every box shows the built-in English as its greyed-out placeholder, so you always know exactly what you are replacing, and anything you skip simply stays in English until you get to it.
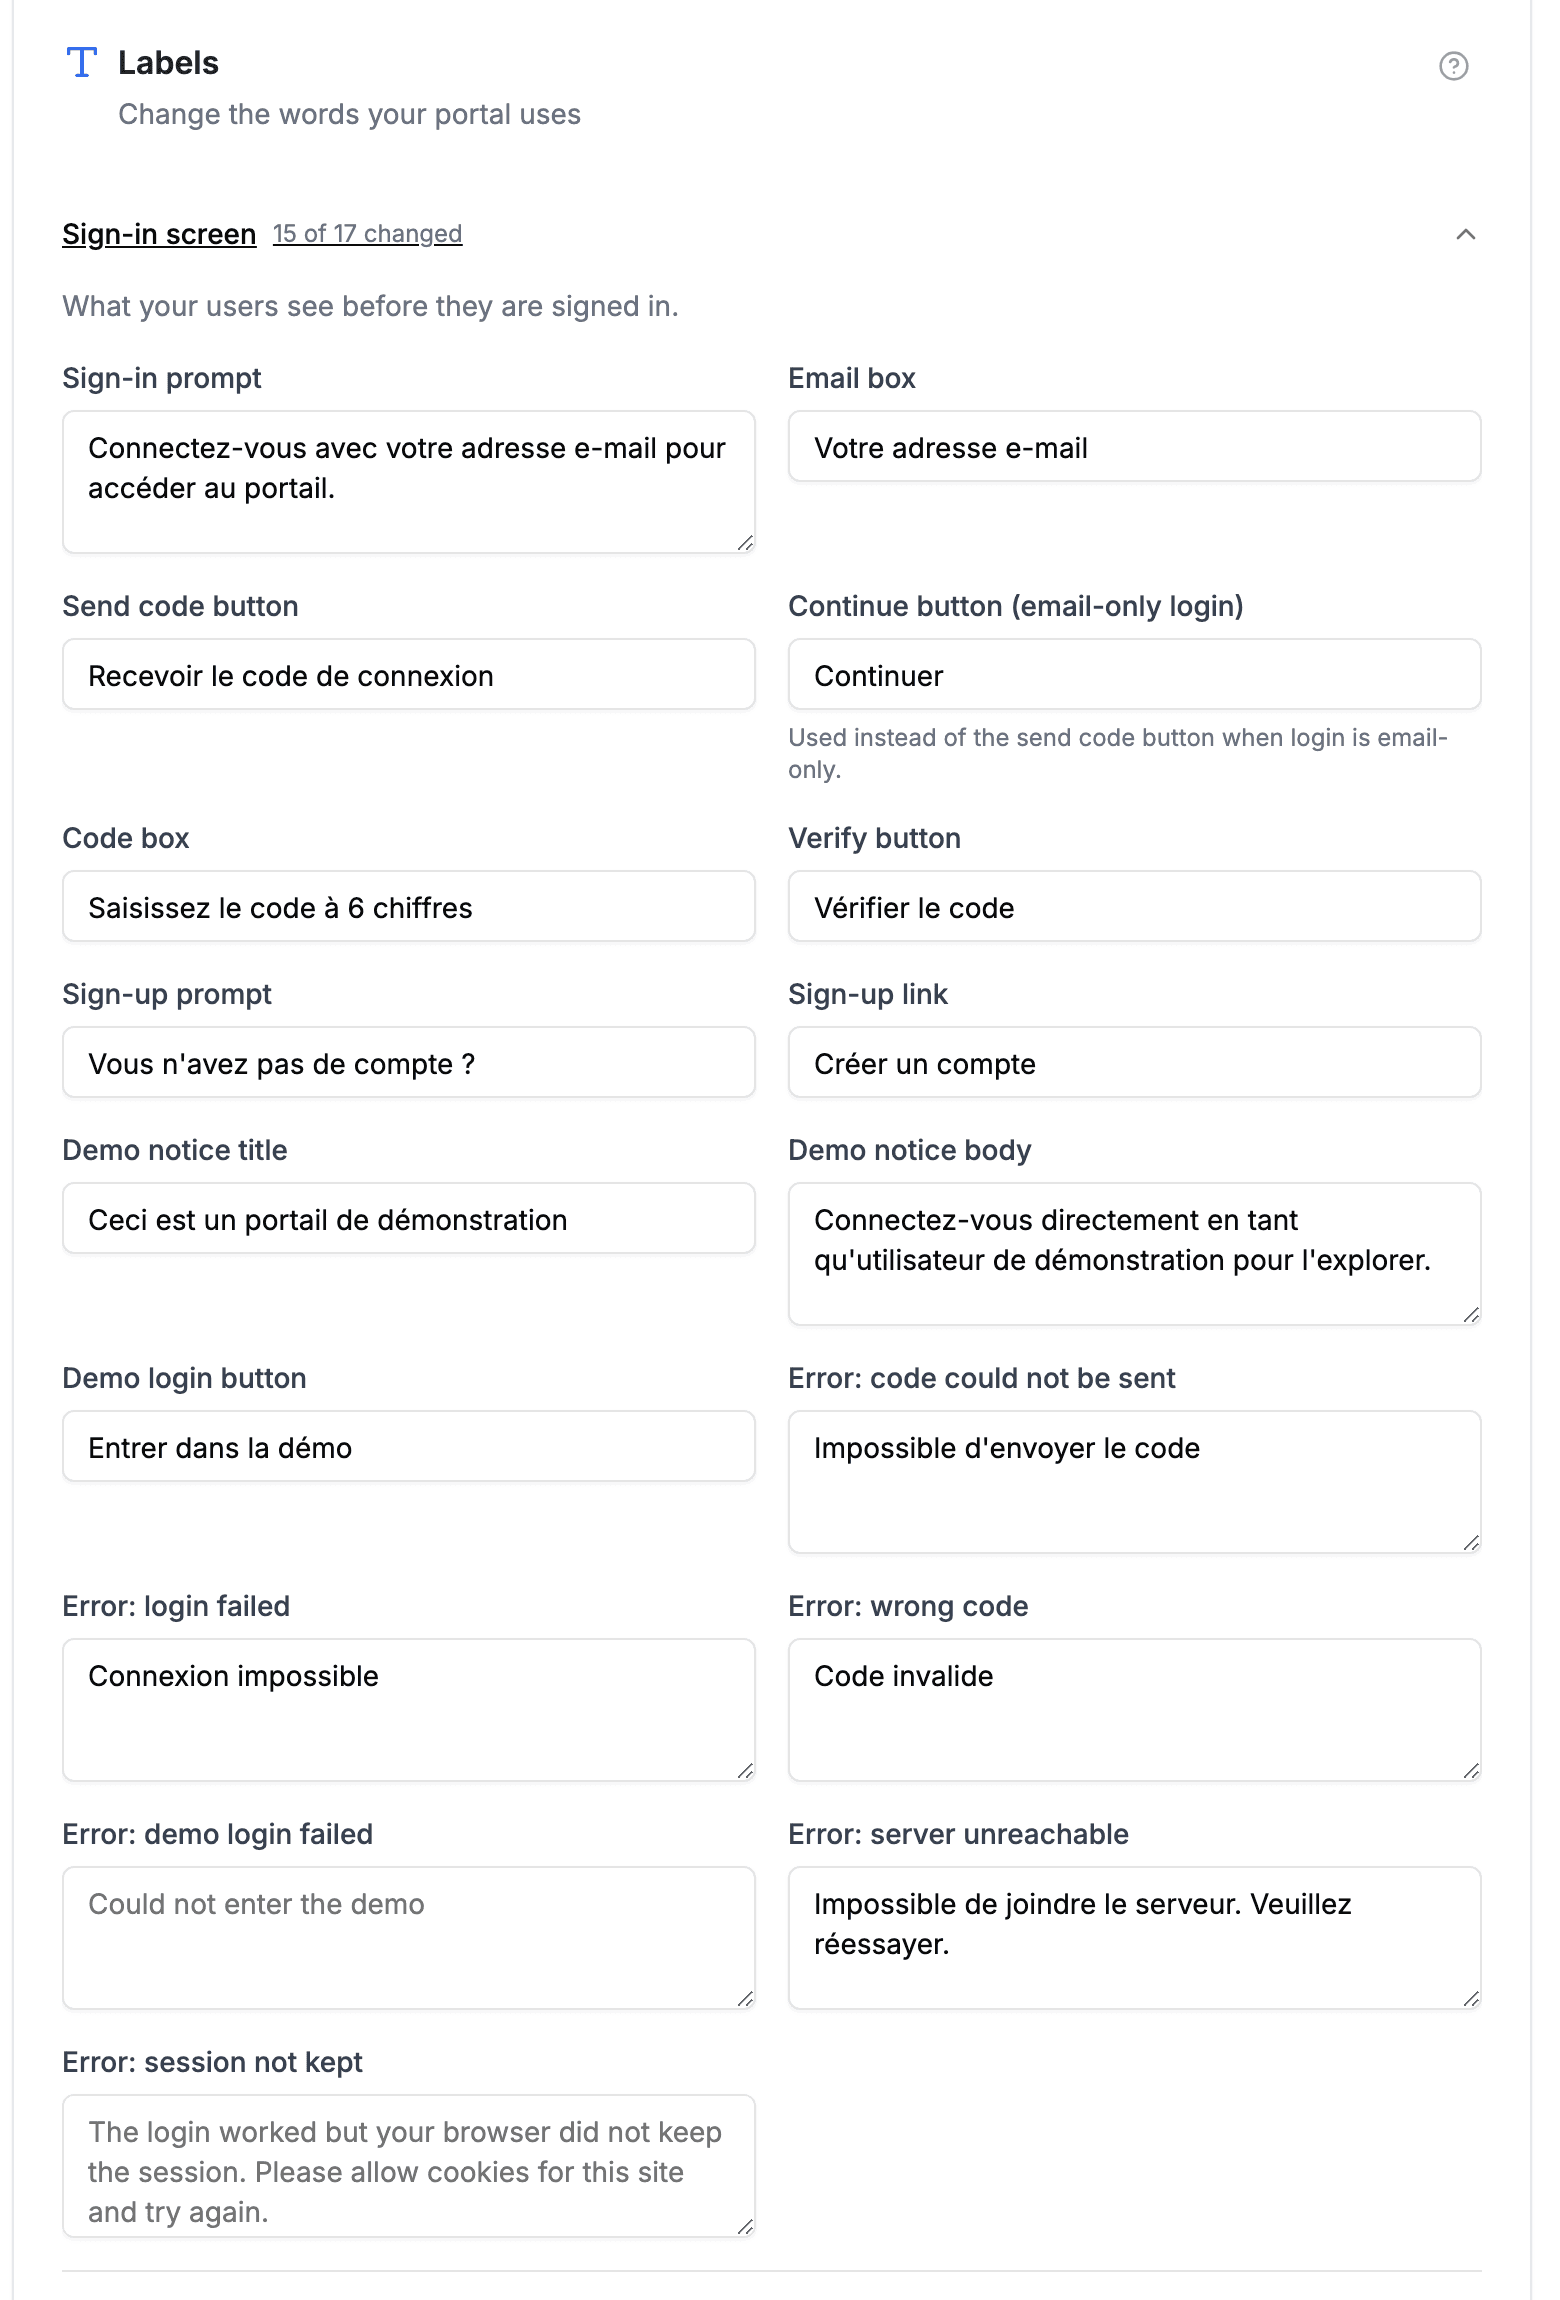
The sign-in section translated into French. The untouched boxes still show the built-in English as greyed-out text, so nothing is lost by translating gradually. - 2
Translate each table's record words
On each page's own Labels tab, set the record name: dossier, intervention, demande. The plural is filled in with an English "s" on the end, so correct it wherever your language forms it differently.
- 3
Translate the login email
The login code email's lines are on the Emails tab, with a live preview and a Send me a test button, so you can read the result in your own inbox before a user does. See customizing the login email.
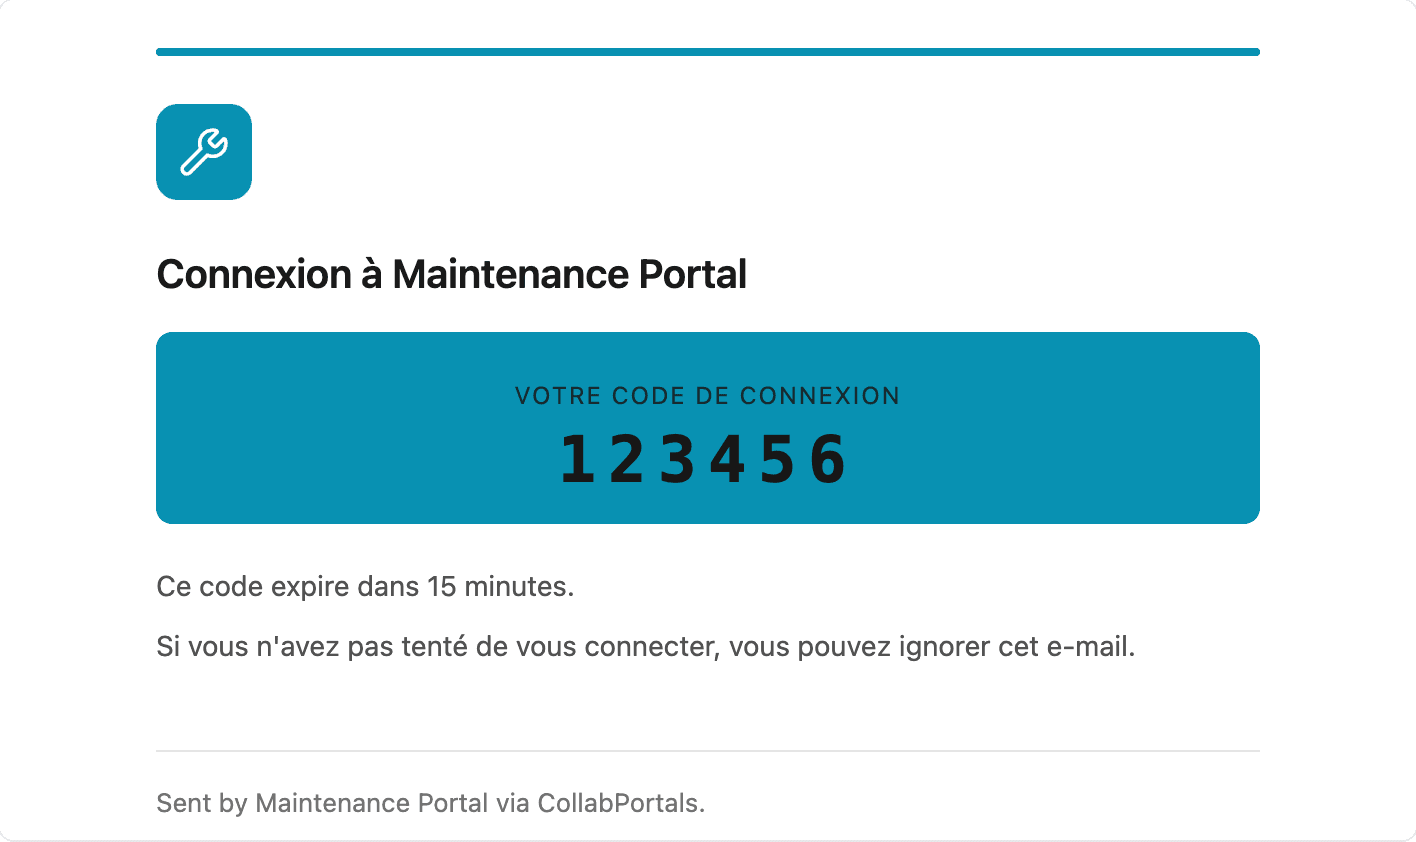
The login code email with its wording set on the Emails tab. The logo and brand colour come from the Design tab.
Here is the result on the sign-in screen:
Field names still come from your Airtable base rather than from labels, so rename the fields in Airtable and the portal follows. Page names no longer have to: set "Page name" on each page's Labels tab and the sidebar, the launcher and the page heading all follow it, so you can translate the portal without touching a table name your team or your automations rely on. A fully translated base plus a filled-in Labels tab is a fully translated portal, apart from the exceptions below.
What labels do not change
- Your Airtable data. Labels change what the portal says, not what is stored. Nothing is written back to your base.
- Field names. The labels on individual fields still come from your Airtable field names.
- "Powered by CollabPortals". The line in the sidebar footer and under the sign-in form stays as it is.
- A few error messages. When your portal cannot reach Airtable, some of what your users see comes back from the connection itself and is not covered by these boxes yet.
Related
- Record Name, which sets which field titles each record
- Portal user authentication, for the login email's Emails tab
- Role-based access, for how roles work
- Table permissions