Role-Based Access Control
How to set up roles in CollabPortals so different users see different tables, fields, and views in the same portal.
Overview
Role-based access control (RBAC) lets one portal show different things to different people. Instead of a single setup for everyone, you point CollabPortals at a field in your Airtable table that holds each user's role, then configure the portal separately for each role. Roles can differ on more than permissions: each role has its own tables, fields, views, filters, and sorting.
One person can hold several roles and switch between them inside the portal, viewing it as one role at a time.
How Roles Work
Each role has its own complete configuration of the portal:
- Table permissions (view, create, edit, delete per table)
- Field permissions (hidden, view-only, editable, required per field)
- Record filters, view layout, sorting, and the record name field
When a portal user logs in, CollabPortals reads their role from your Airtable table and applies that role's configuration. If their role is empty, or doesn't match a configured role, they fall back to the Default role.
A user can hold more than one role, in which case they choose which one they are viewing the portal as. That is covered in When someone holds more than one role.
Setting Up Roles
- 1
Add a role field to your Airtable table
Add a field to the table that holds your portal users (the same table you use for their email login). It needs to be a single select, multiple select, or linked record field. For example, add a "Role" field with values like "Technician" and "Stage Manager". The values in this field become your roles.
Use a multiple select, or a linked record field with more than one record linked, if someone needs to hold more than one role. A single select holds one value, so it gives each user exactly one role. See When someone holds more than one role below.
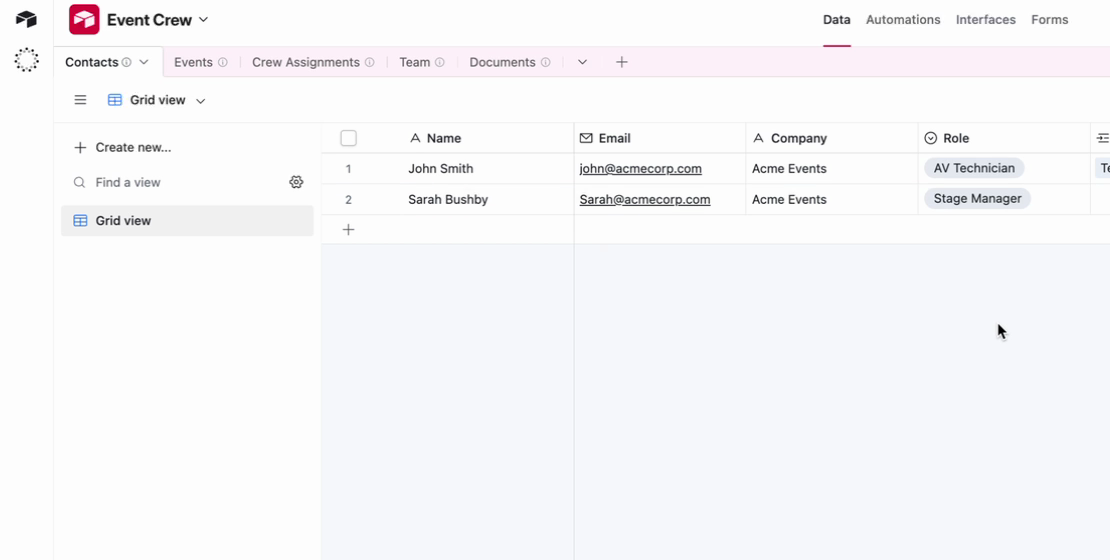
The Contacts table in Airtable, with a single select Role field. Each contact's value becomes their role in the portal. - 2
Point CollabPortals at the field
In your portal's Setup tab, scroll to the bottom to the Role Field (Optional) dropdown and select your role field. Only single select, multiple select and linked record fields from your user table appear here. Selecting one turns on roles and creates a Default role automatically.
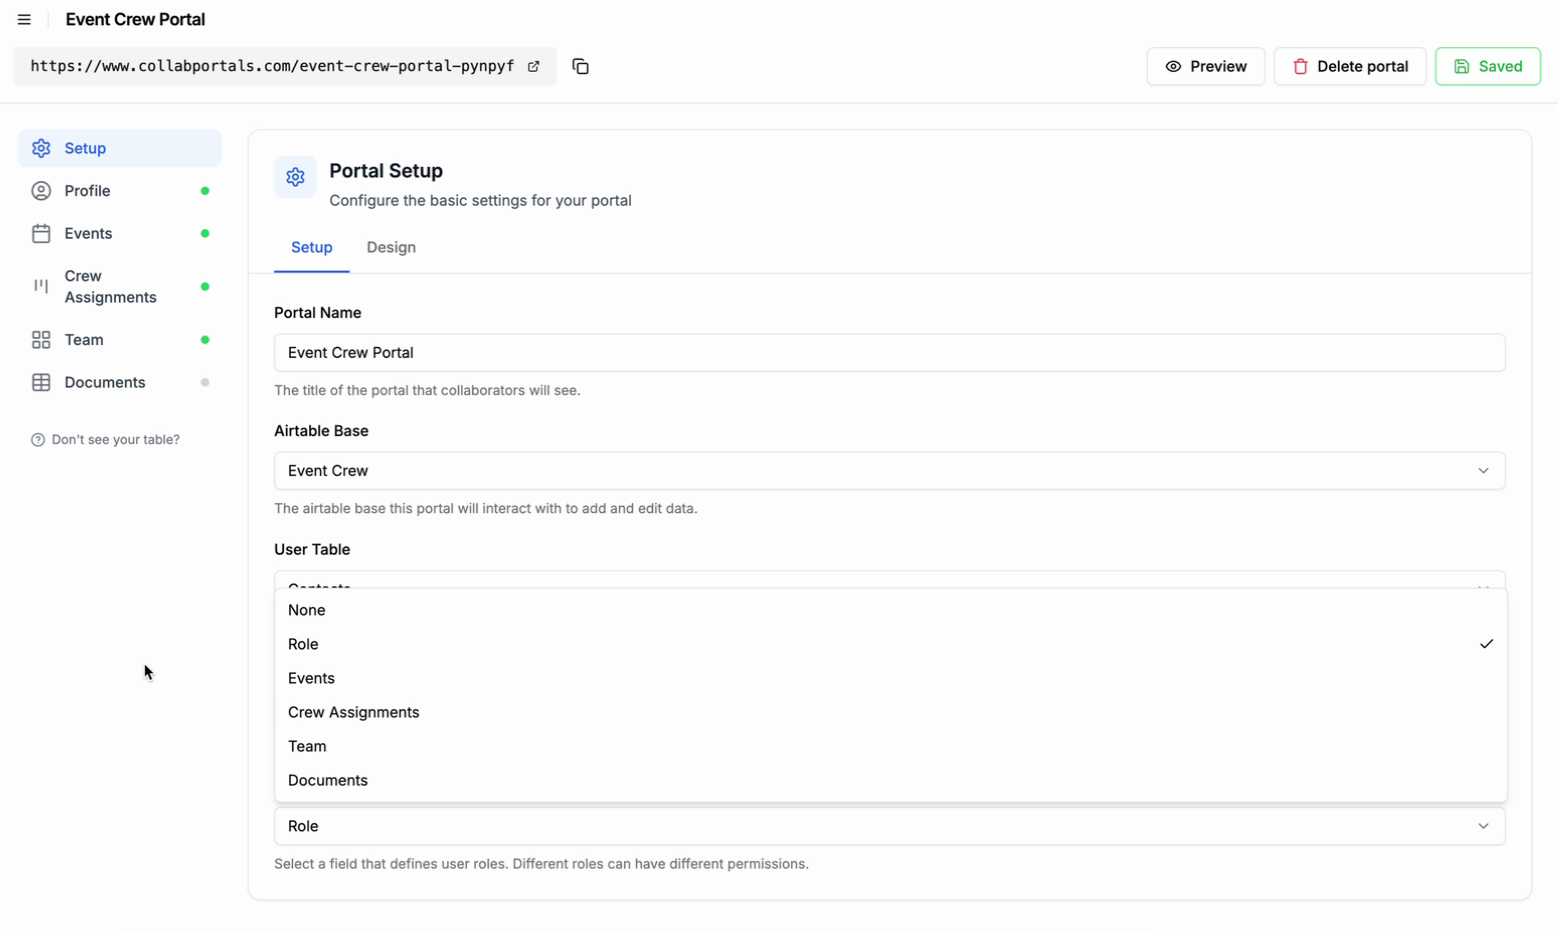
The Role Field setting at the bottom of the Setup tab. Only single select, multiple select and linked record fields appear. - 3
Configure the Default role
Once a role field is set, every table's configuration shows a role bar across the top with Default selected. The Default role is the baseline everyone gets, so set it up first. For example, in an event crew portal you might disable the Documents table for the Default role so the wider crew can't see it.
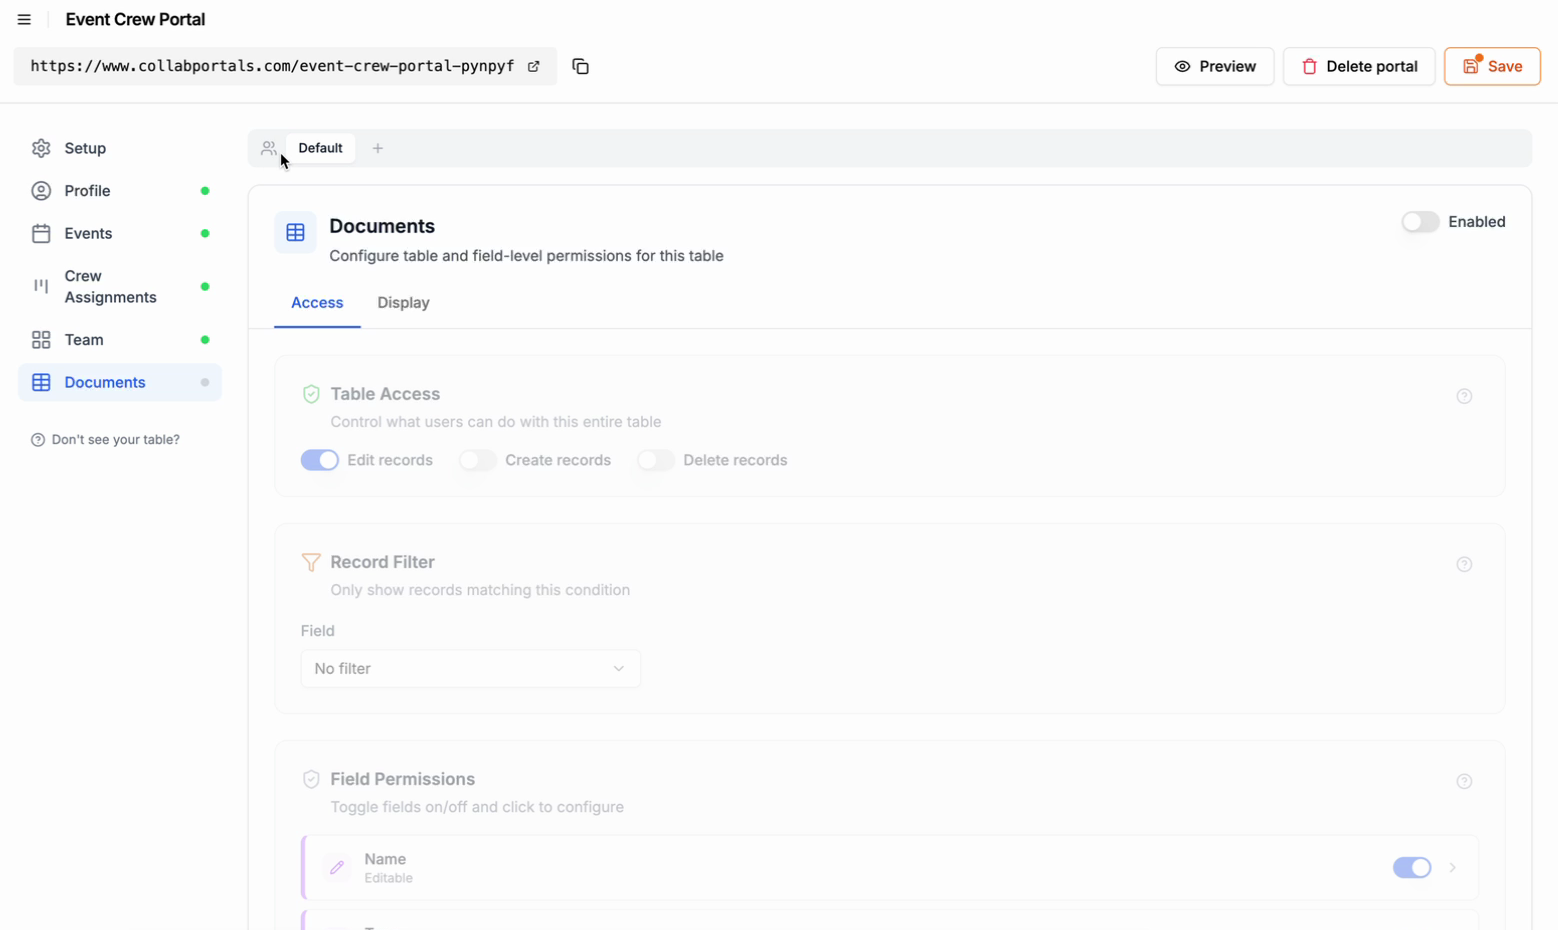
On the Default role, the Documents table is switched off, so most of the crew never sees it. - 4
Add a role on top of the default
Click the + (Add role) on the role bar and pick one of your roles. The role bar lists the values from your field, so the names always line up. A new role starts as a copy of the Default, so you only change what should be different. Carrying the example forward, you would add a "Stage Manager" role and enable the Documents table just for them. You can override anything per role here, not only permissions: tables, fields, views, filters, and sorting.
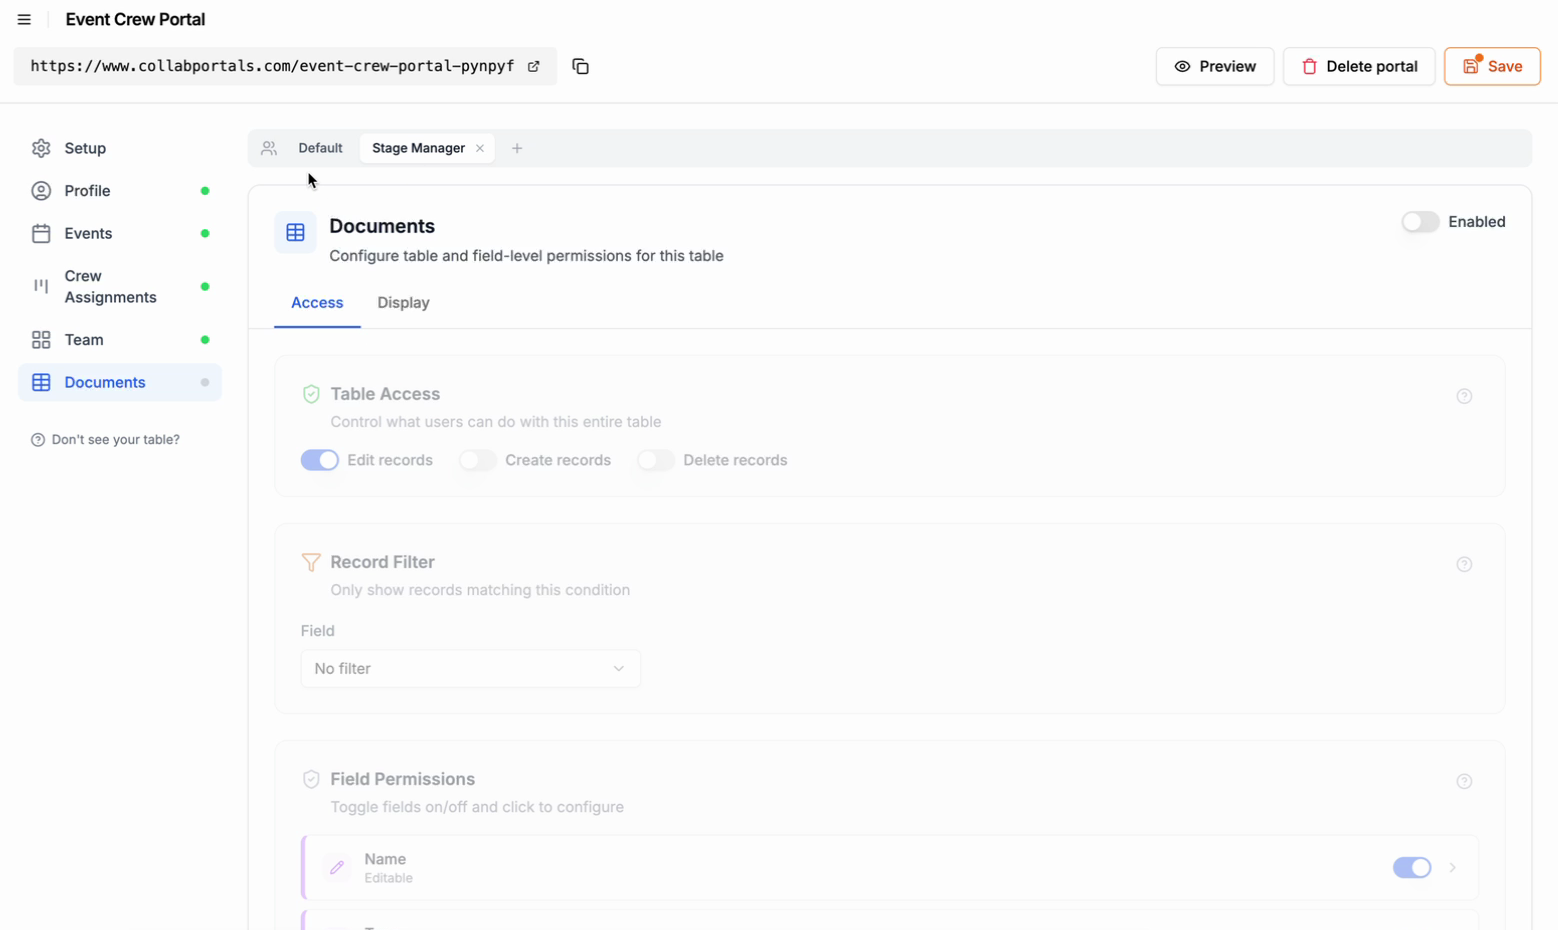
Add a Stage Manager role on the role bar. It starts as a copy of the Default, ready to enable the Documents table. - 5
Preview as each role
Use the portal preview to view it as different users and confirm each role sees the right thing. Preview as a technician and the Documents table is hidden; preview as a stage manager and it appears.
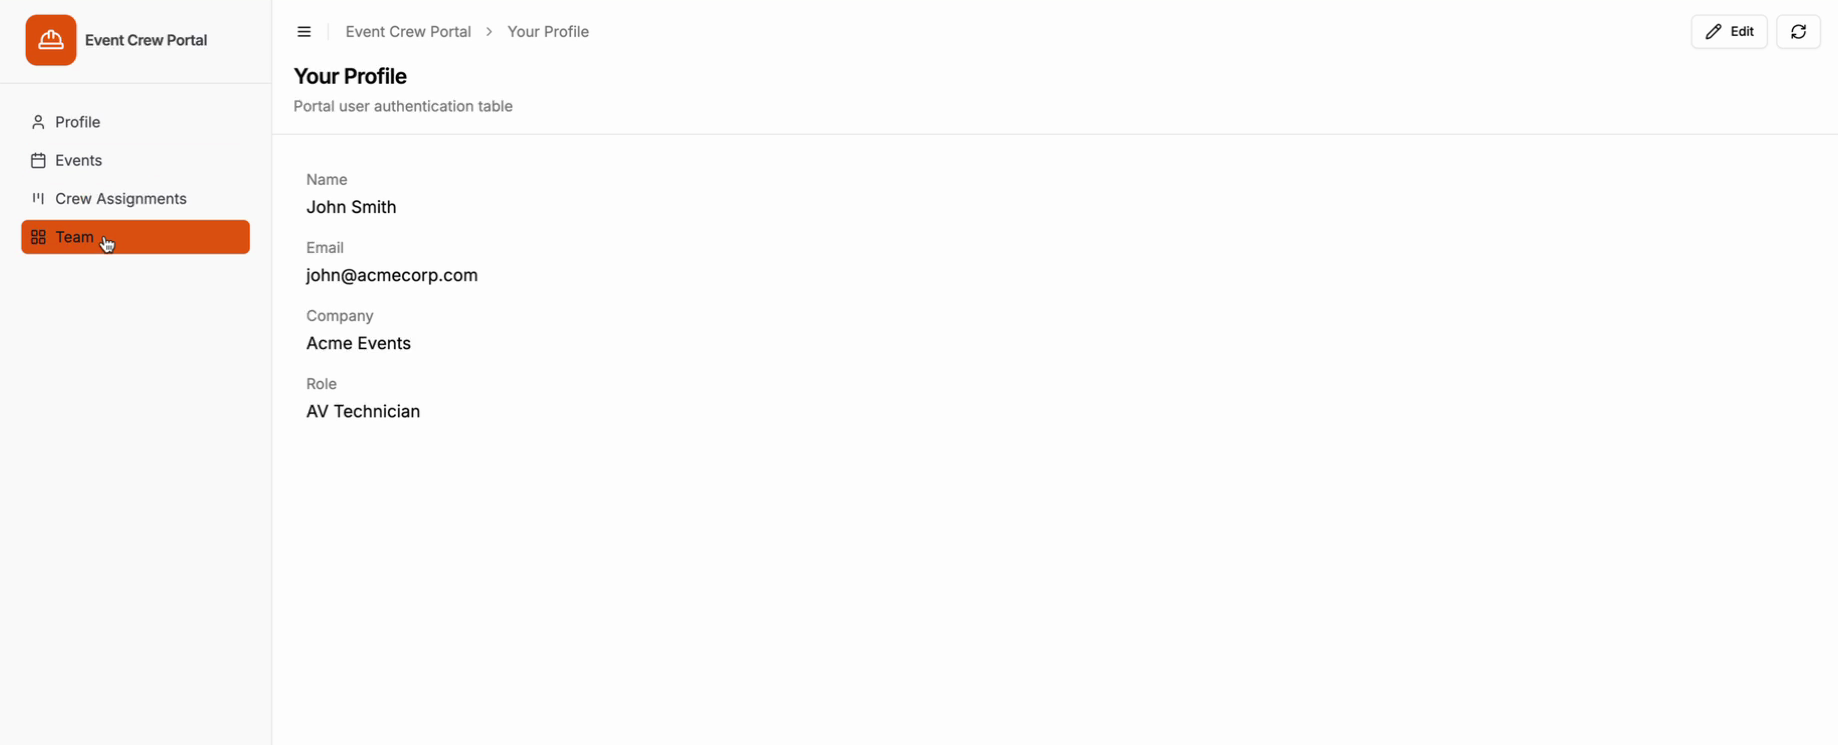
Previewed as a technician (the Default role): the sidebar has no Documents table.
The values in your role field must match the roles you configure. If a contact's role is "Stage Manager", you add a role called "Stage Manager". Because the role bar lists the values straight from your field, they always line up.
Default Role
The Default role is created for you the moment you set a role field, and it is the fallback. Any user whose role is empty, or whose role value doesn't match a configured role, gets the Default. Every new role you add starts as a copy of the Default, so you only adjust what differs.
Configure the Default role as the most restrictive baseline, then open things up for specific roles. That way a missing or misspelled role value gives a user minimal access rather than too much.
Renaming a Role
A role's name is matched against your Airtable role field letter for letter. Rename the choice in Airtable and nothing in the portal points at it any more: everyone carrying that value falls back to the Default role, with no error and no warning. It is a permission change you would only notice by looking.
Renaming the role in CollabPortals is how you put the two back in step. Click the pencil on the role's tab. The dialog lists the choices your role field currently offers, with a search box, and you pick one. Everything set up under that role comes with it, its table and field permissions, filters and labels, because the role keeps its identity and only its name changes.
There is no box to type a name into, on purpose. A name matching no Airtable choice is a role nobody can hold, which is the problem this is here to fix.
Picking a name another role already holds is allowed, and the list shows who holds it. That is how you swap two roles over. The role that gave up the name is renamed to something like "Editor (old)" and flagged under the tab bar, keeping every one of its own settings, until you give it a name of its own or remove it.
Renaming is a permission change rather than a cosmetic one: anyone Airtable gives that name gets this role's permissions.
Changed a choice in Airtable a moment ago and cannot see it in the list? The options are read when the editor page loads. For a single or multiple select role field, click Refresh in the header. For a linked record field, reload the page.
When someone holds more than one role
A multiple select field, or a linked record field with more than one record linked, gives one person several roles. When a portal user holds two or more roles that this portal configures, a role switcher appears in their sidebar, under the portal name, reading "Viewing as: Technician". Picking a different role reloads the portal with that role's tables, fields, views, filters and permissions.
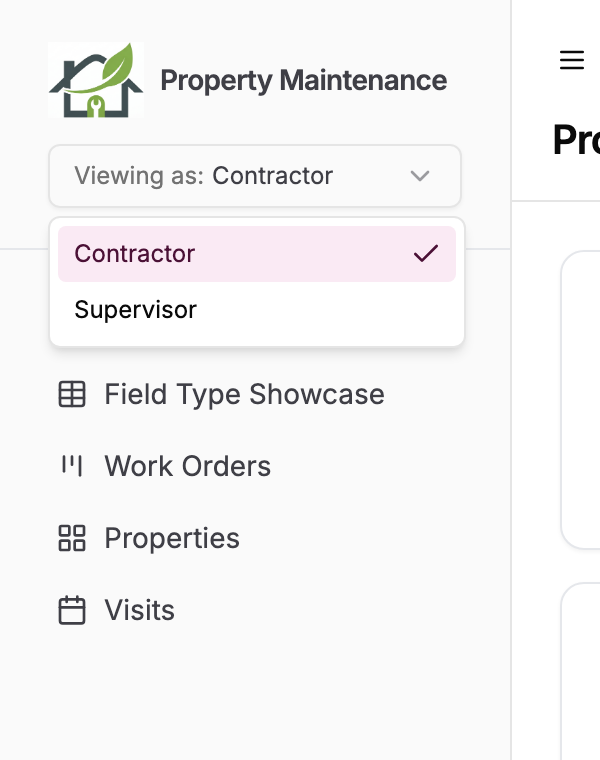
Holding two roles does not combine them. The portal applies one role at a time, exactly as configured. Someone who is both a Technician and a Stage Manager sees the Technician setup or the Stage Manager setup, never a merge of the two. If you want a person to have everything both roles can do, give that combination its own role.
Which role they start on
They start on the first value in their Airtable cell, reading left to right, not the Default role and not alphabetically. Reordering the values in Airtable changes where someone lands, as long as they have not already picked a role from the switcher: once they have, their choice stands until they sign out.
If that first value is not a role you have configured, they get the Default role's settings. What happens next depends on how many configured roles they hold:
- Two or more: the switcher appears, offering those roles, and they can pick one. Until they do, they are on the Default.
- Only one: there is no switcher, and they stay on the Default. Fix it by configuring that first value as a role, or by reordering their cell in Airtable so a configured role comes first.
If the first entry cannot be read at all, for example a linked role record whose name is empty, they also get the Default role's settings. They are deliberately not moved on to their second role: doing so would quietly give someone more access than the value in Airtable asks for.
What the switcher shows
- It appears only when someone holds two or more configured roles. One role behaves exactly as it always has, with no switcher.
- It lists only roles you have configured on this portal. A value in someone's role field that you have not set up is never offered.
- The choice is stored in their portal session, so it survives closing the browser. It is dropped when they sign out or the session expires, and the next sign-in starts them on their first role again. Switching does not extend the session.
- Switching keeps them on the table they were looking at, as long as the role they switch to can still view it. If it cannot, they land on the portal home page instead, so they are never dropped on a page the new role has no access to. Switching from a record takes them to that record's table, since whether the new role can see a particular record depends on your visibility and filter settings.
- CollabPortals reads up to 20 roles per person. Values past the twentieth are ignored: they do not apply and are not offered.
Removing a role from someone
Removing a role in Airtable takes effect within about a minute, without waiting for them to sign out. If they were viewing the portal as the role you removed, they drop back to the first value left in their cell, or to the Default role if that value is not one you have configured, and the removed role stops appearing in their switcher. The short delay is a cache on their user record, so allow a minute before checking.
Example: an event crew portal
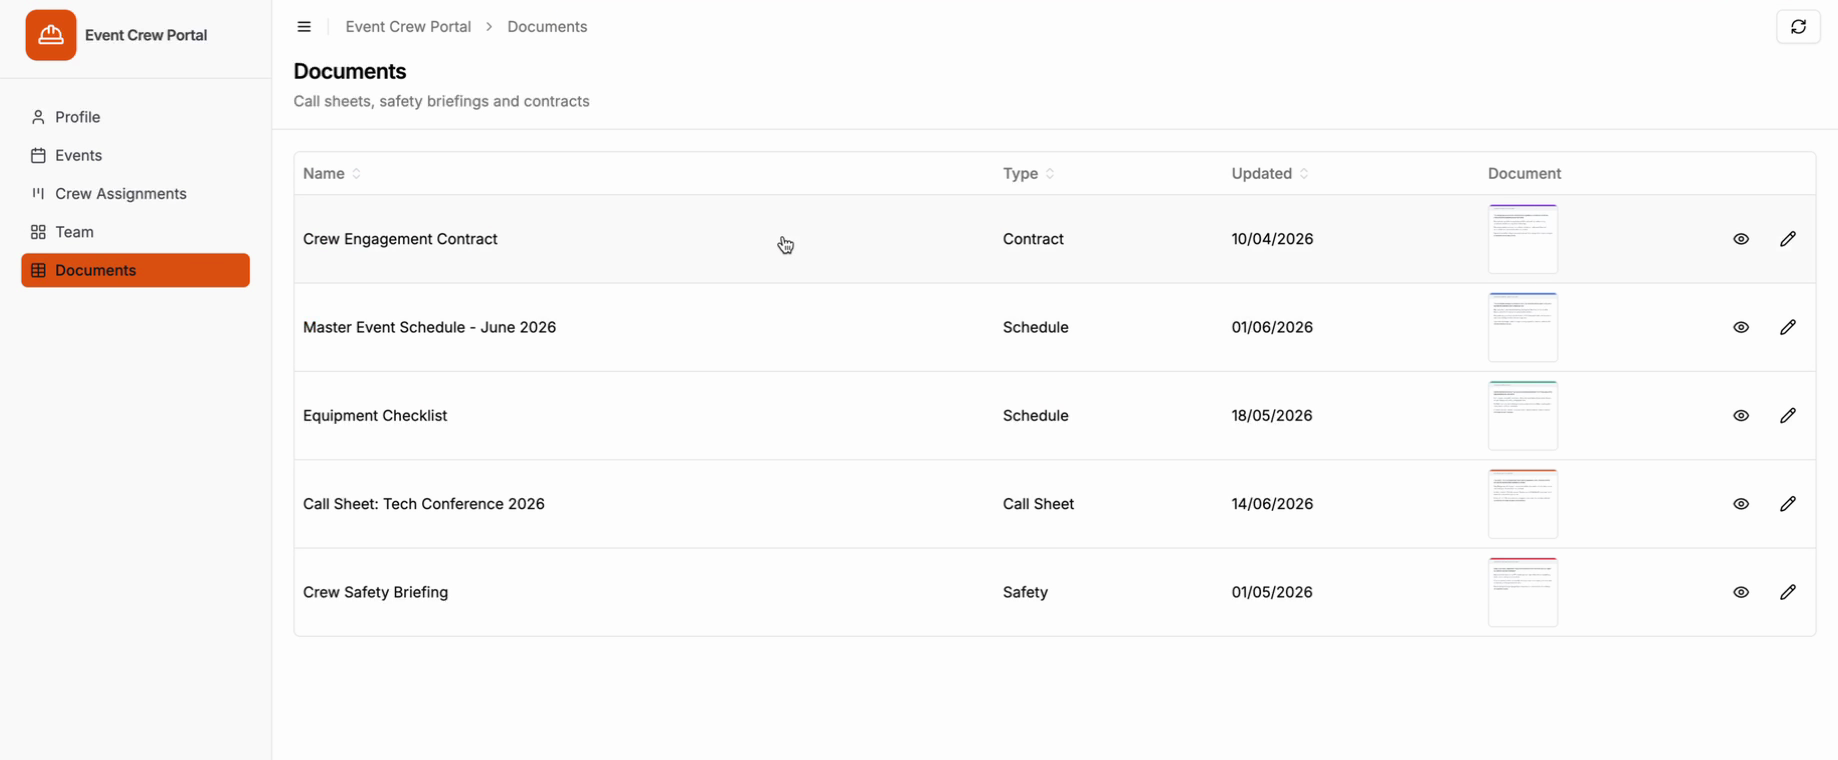
The video above walks through this setup. An event crew base has a Contacts table with a "Role" field (values like Technician and Stage Manager) and a Documents table that most of the crew shouldn't see.
- Default role: the Documents table is disabled, every other table stays visible. Technicians, and anyone without a matching role, get this.
- Stage Manager role: a copy of the Default, but with the Documents table enabled to view and edit.
Preview as a technician and the Documents table is hidden. Preview as a stage manager and it appears, editable. Everything else about each page, from views to field permissions, can be tailored the same way.
Another pattern: viewer, editor, admin
A common three-role setup for content-style portals:
Viewer
- Can view all tables
- Cannot create, edit, or delete
- All fields are view-only or hidden
Editor
- Can view and edit all tables
- Can create records
- Cannot delete records
- Key fields are editable, sensitive fields are view-only or hidden
Admin
- Full access to all tables (view, create, edit, delete)
- All fields visible and editable
- Can see internal fields that other roles can't
Use Cases
Roles show up across most portal types. See them applied in client portals, retail operations portals, and membership management portals.
Client Portal with Different Client Tiers
- Standard clients can view their projects and create requests
- Premium clients can also edit project details and see additional fields
Team Collaboration
- Team members can view and edit tasks assigned to them
- Managers can create and delete tasks, and see reporting fields
- Stakeholders have view-only access to project summaries
Data Collection
- Submitters can create new records and view their own submissions
- Reviewers can edit records and update status fields
- Admins can delete records and see all fields
Without Roles
If you don't set up roles, all portal users share a single setup. This is perfectly fine for simple portals where everyone needs the same access. You can always add roles later without disrupting existing portal users.
Next Steps
- Table Permissions - Configure per-role table access
- Field Permissions - Configure per-role field access
- Portal User Authentication - How users are identified
- Filter & Sort Controls - Give each role its own filter, search and sort fields