Build an Airtable Client Portal in Minutes
Give your clients secure, branded access to their project data in Airtable. No extra seats, no code, no complex setup, just share a link.

See it working, then start from a ready-made Airtable base.
See a live demoCopy the Airtable templateThe Problem: Sharing Airtable Data with Clients
You track everything in Airtable, projects, deliverables, timelines, invoices. But when a client asks for an update, your options are limited:
- Add them as an Airtable collaborator, they see everything, including data from other clients, internal notes, and cost breakdowns you would rather keep private. Plus, each seat costs $20/month on Team plans.
- Export to a spreadsheet, stale the moment you send it. Clients reply with questions about outdated data.
- Build a custom app, weeks of development time and ongoing maintenance for something that should be simple.
- Use a no-code app builder, $50 to $170+/month for features you do not need, with per-user charges that scale with your client base.
What you actually need is a way to let clients log in and see just their data, with exactly the fields and permissions you choose, without exposing your entire base.
How CollabPortals Solves This
CollabPortals connects to your existing Airtable base and creates a branded portal that your clients access via a shared link. You control everything:
Table-Level Permissions
Choose exactly which tables each portal exposes. A manufacturing company might show clients their Orders and Shipments tables while hiding internal Costs and Supplier tables entirely.
| Table | Client Access | Why |
|---|---|---|
| Projects | View, edit | Clients update project details and leave comments |
| Deliverables | View only | Clients check status without modifying records |
| Invoices | View only | Clients see billing history, but cannot change amounts |
| Internal Notes | Hidden | Staff discussions stay private |
| Cost Breakdown | Hidden | Margin data stays internal |
Field-Level Permissions
Within each visible table, you pick which fields clients can see and which they can edit. Show the "Status" field but hide "Internal Priority". Let clients edit their "Contact Info" but not their "Account Tier". View, create, edit and required are separate settings on each field, so you can also collect something at intake and lock it afterwards, and a field with all four off is never sent to the client's browser at all.
Email-Based Authentication
Clients log in with their email address via a verification code, no passwords to manage. CollabPortals matches each client to their record in your Airtable Users table, so they only see data linked to them.
Real-World Client Portal Patterns
Based on how teams actually use CollabPortals, client portals typically follow one of these patterns:
The Status Dashboard
Clients log in primarily to check progress. Most tables are read-only, with one editable table for client feedback or requests.
Common in: agencies, consultancies, manufacturing, construction
- 3 to 5 visible tables
- 1 table with create/edit access (requests, feedback)
- Remaining tables are read-only status views
- 20 to 40% of fields hidden per table
The Collaborative Workspace
Clients actively contribute data alongside your team. Multiple tables allow full CRUD operations with field-level restrictions protecting sensitive columns.
Common in: healthcare, education, legal, financial services
- 5 to 15 visible tables
- Most tables allow create and edit
- Heavy field-level restrictions (hiding internal-only columns)
- Users table for client self-service profile management
The Data Collection Portal
Clients submit structured data through your Airtable schema. They can create and edit their own records but cannot delete or see other clients' submissions.
Common in: insurance, onboarding workflows, intake forms, surveys
- 2 to 6 tables with create and edit access
- Read-only reference tables (lookup data, guidelines)
- Required fields enforced at the portal level
What Makes This Different from Airtable Interfaces
Airtable Interfaces is Airtable's built-in tool for creating views. It is great for internal dashboards, but it was not designed for external client access:
| Capability | CollabPortals | Airtable Interfaces |
|---|---|---|
| External user access | Yes, email verification, no Airtable account needed | No, requires an Airtable seat ($20/month each) |
| Per-user cost | None, unlimited users for $10/month | $20/month per user on Team plan |
| Field-level permissions | Per-portal granular control | Tied to Airtable's permission system |
| Custom branding | Logo, theme colours, favicon, portal name, and your own custom domain | Limited to Airtable's UI |
| Setup time | Minutes | Minutes (but limited to internal users) |
The key difference: Airtable Interfaces is for your team. CollabPortals is for your clients. For a deeper look, see our full comparisons of CollabPortals vs Airtable Interfaces and CollabPortals vs Airtable Portals.
Build a Client Portal Step by Step
Here is how the live demo above is put together. It takes about an hour the first time, with no code involved.
- 1
Set up your Airtable base
Start with a table for each part of the work: a Projects table for the jobs you run, a Deliverables table, an Assets library for logos and designs, a Schedule for meetings and milestones, and a Contacts table for the people who log in. Contacts is the hub. It holds each client's email, and their projects, deliverables and assets link back to it, so each client only ever sees their own work.
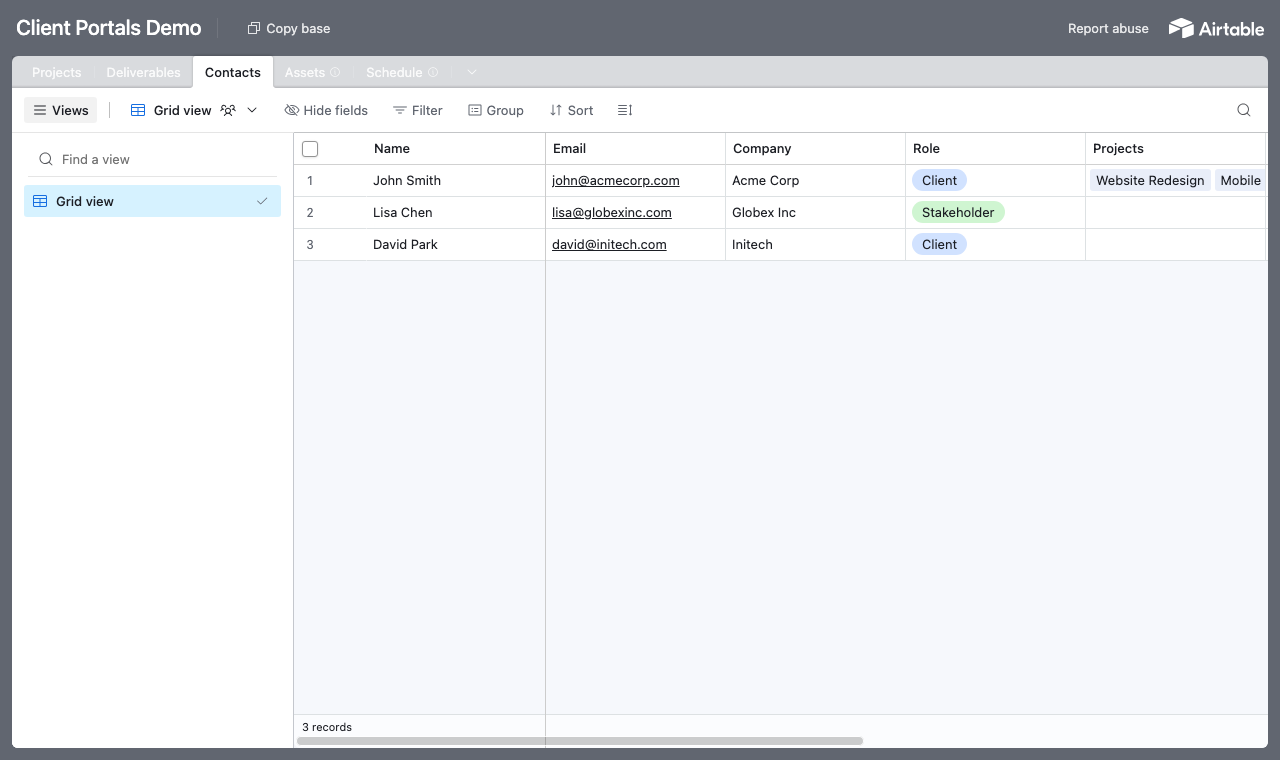
A table for each part of the work, with a Contacts table every project links back to. - 2
Connect the base and pick the user table
Point CollabPortals at that base, then choose Contacts as your user table and Email as the login field. Each client signs in with their email and is matched to their own record.
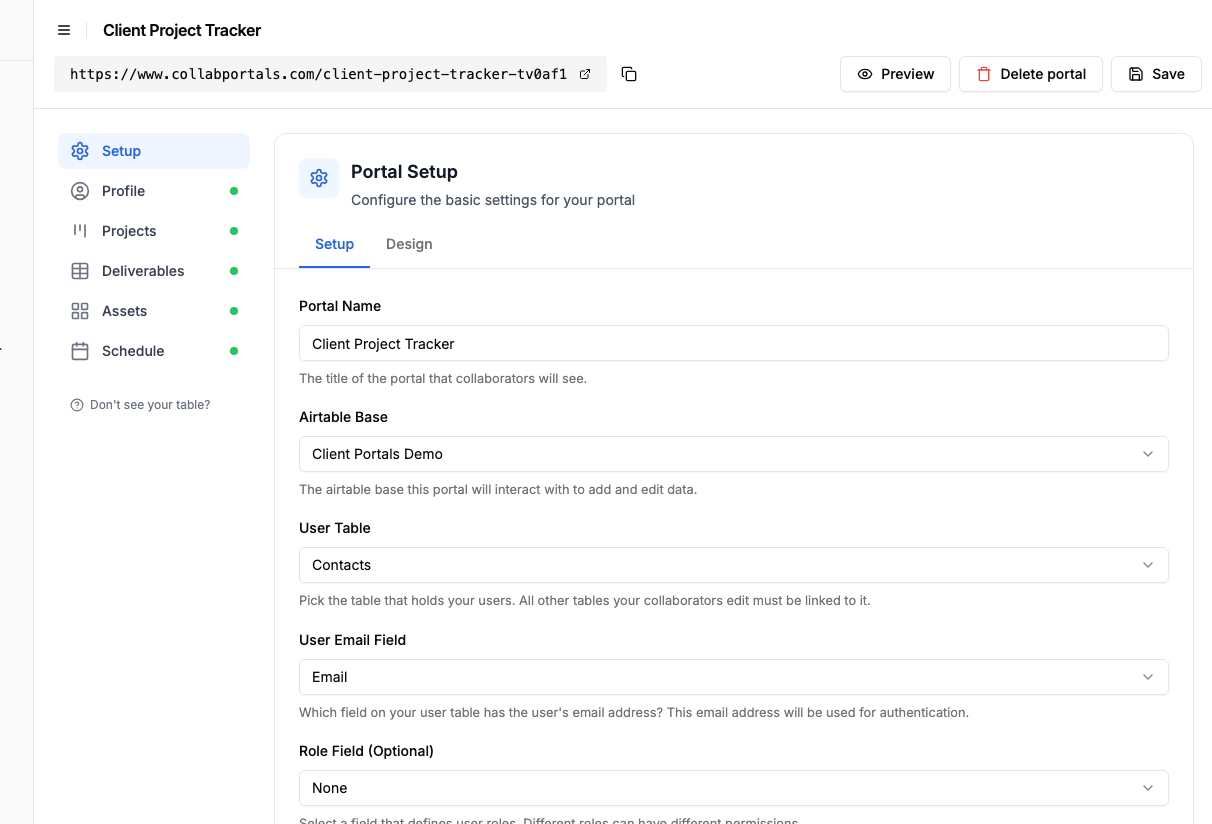
Connect the base, then point CollabPortals at the Contacts table and its email field. - 3
Let clients update projects, hide your margins
On the Projects table, turn on create and edit so clients can update a project and leave detail, and leave delete off. Show the fields they should see, like status, dates and budget, and hide internal ones. Keep Deliverables and invoices view only, and your cost breakdowns and internal notes stay in Airtable for you.
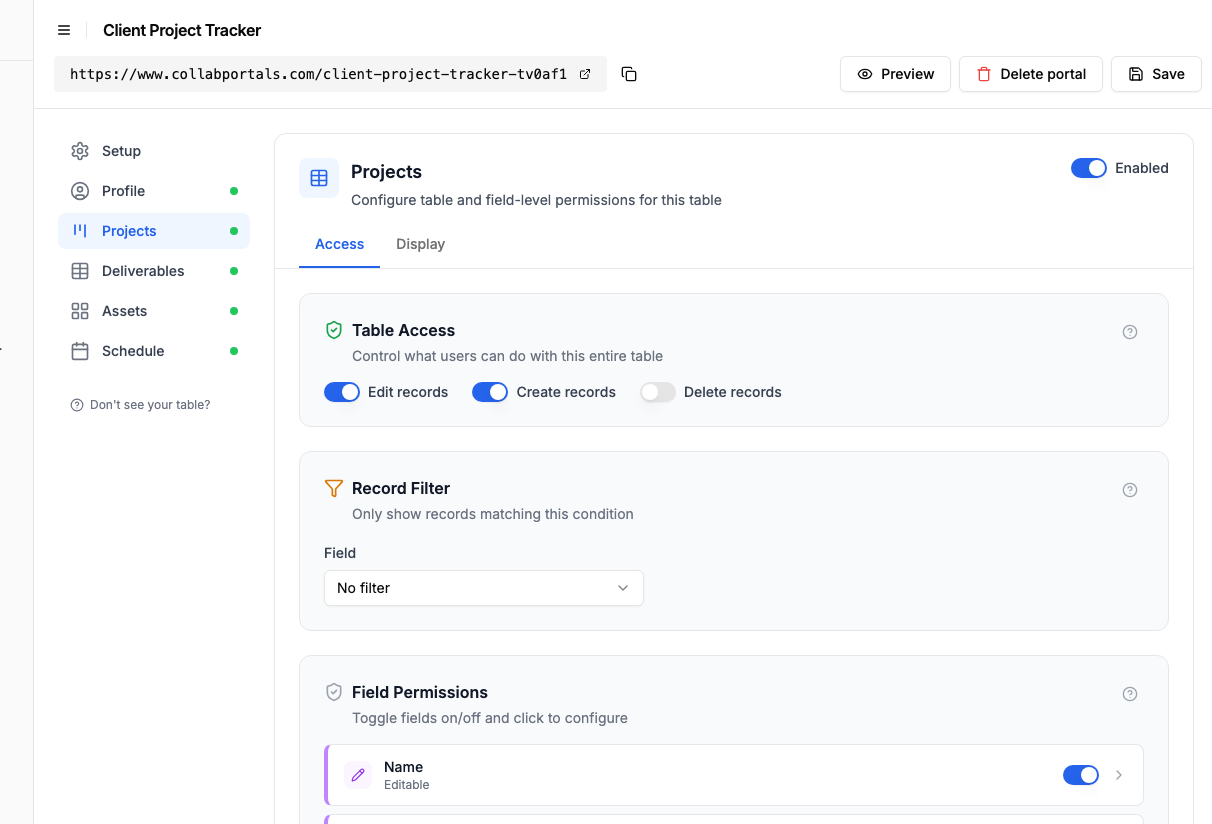
Let clients update their projects, while margins and internal notes stay hidden. - 4
Give each table the view that fits
Pick how each table appears. Projects as a board so a client watches work move from Planning to In Progress to Complete, Assets as a gallery of logos and designs, Schedule on a calendar, Deliverables as a table. Same Airtable data, shaped for the client.
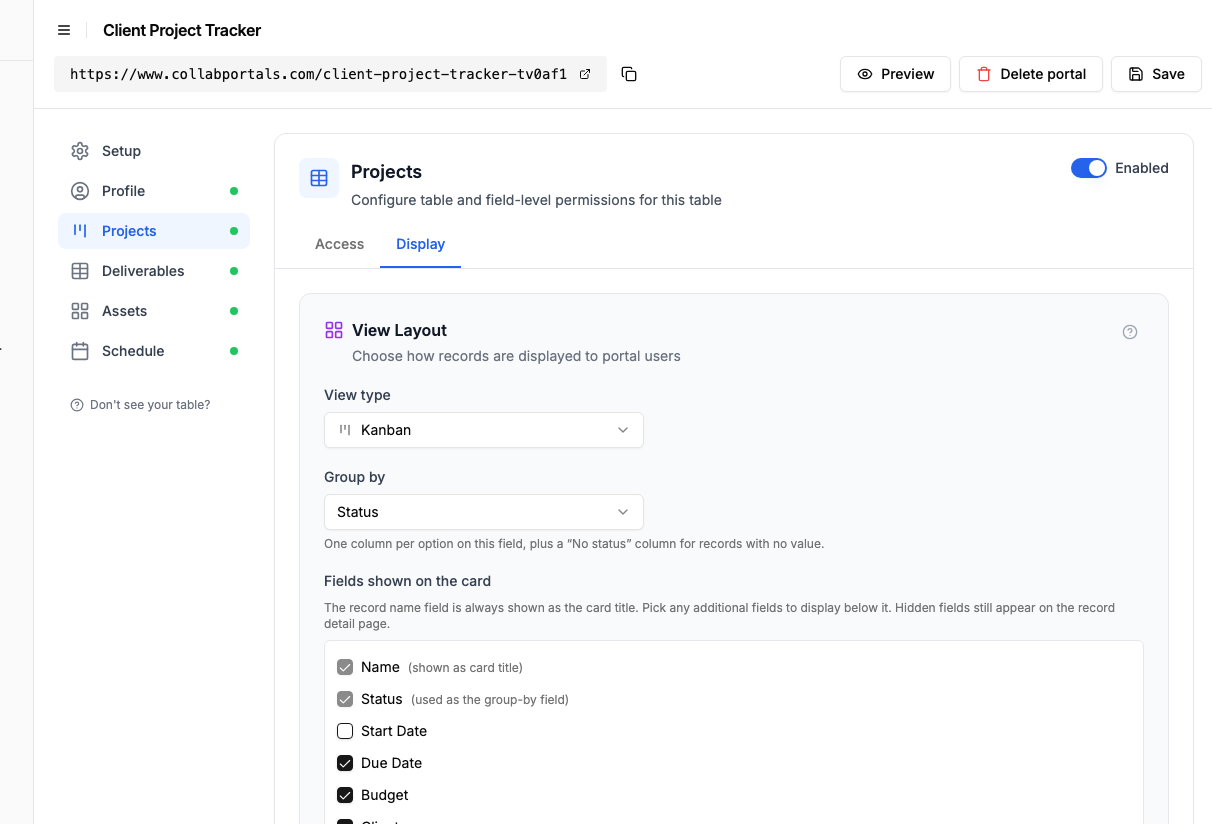
The Display tab lays the Projects table out as a board grouped by status. - 5
Clients track their projects
The result is a clean, branded portal. Each client signs in, sees only their own projects with budgets and due dates, and watches them move across the board as your team works, all reading straight from your Airtable base.
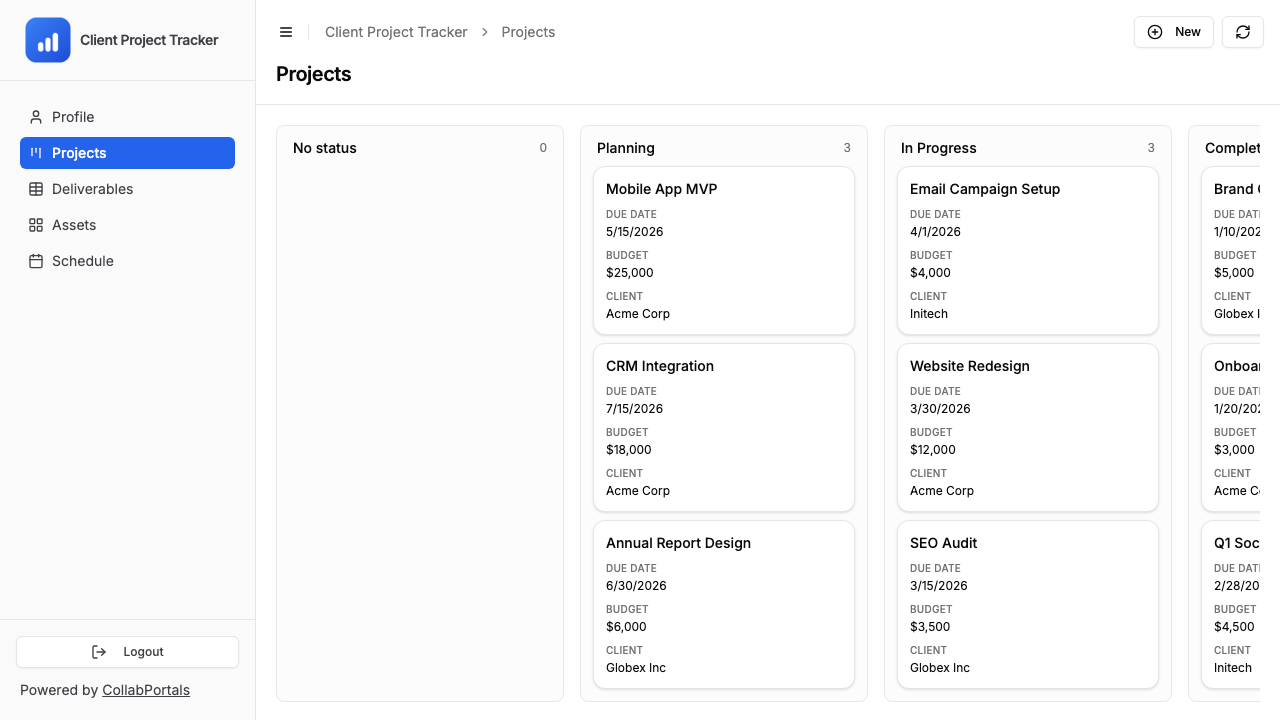
Clients see their own projects on a board, with budget and due date on every card. - 6
They log in with their email
Share the link with your clients. Each one signs in with their email and a one-time code, so there are no passwords to manage and no Airtable seats to buy.
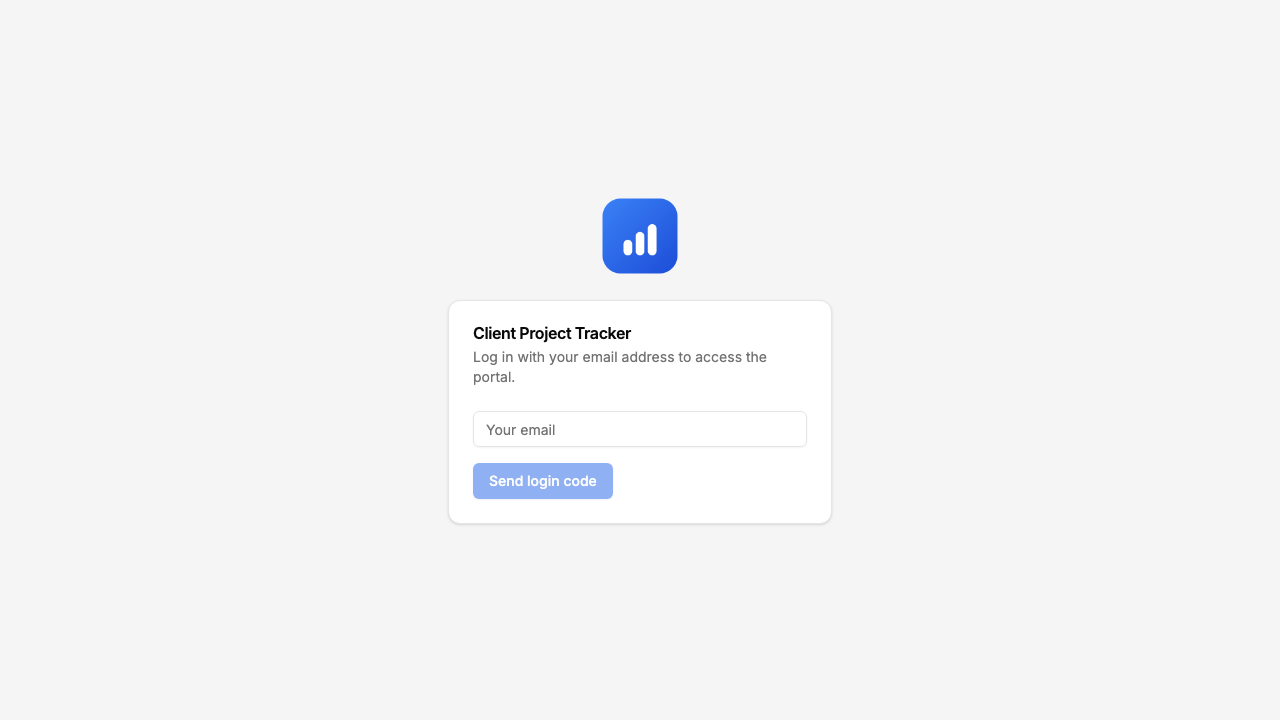
Email and one-time code login, branded with your logo and colour.
Want to start from this exact setup? Open the live demo or copy the Airtable template and connect it to your own base in minutes.
Take It Further
The walkthrough above is the whole build. A few options are worth knowing once you are up and running:
- One portal, many clients. Every client is matched to their Contacts record by email, so the same portal serves all of them, each seeing only their own projects and assets, with no duplicated setup.
- Editable profiles. Give the Contacts table edit access so clients keep their own contact details and company info current.
- Asset uploads. Turn on create on the Assets table so clients add their own files, like brand assets or reference images, straight into your base.
- Nest deliverables under each project. Turn on related tabs so a project's deliverables, files and updates show as tabs on the project record, scoped to it.
After set-up, every update and upload lands in your Airtable base, where your team already works.
For the generic version that applies to any base, see the setup guide.
Frequently Asked Questions
How do clients log in to the portal?
Clients enter their email address and receive a verification code. CollabPortals matches their email to a record in your Airtable Users table, so they only see data linked to them. No passwords to manage.
Can different clients see different data?
Yes. Each client is matched to their record in your Airtable Users table via their email address. They only see records linked to them, not other clients' data. You control which tables and fields are visible at the portal level.
What if I need to hide specific fields from clients?
CollabPortals has field-level permissions. For each table, you choose which fields are visible and which are editable. You can show a Status field but hide an Internal Priority field, for example.
How much does it cost compared to adding Airtable seats?
CollabPortals costs $10/month for unlimited users and unlimited portals. Adding clients as Airtable collaborators costs $20/month per user on Team plans. For 10 clients, that is $10/month vs $200/month.
Does my data leave Airtable?
No. CollabPortals reads and writes directly to your Airtable base using the Airtable API. Your data stays in Airtable, CollabPortals is just a controlled window into it.
Can clients create new records?
Yes, if you enable create permissions on a table. You can allow clients to submit new records (like requests or feedback) while keeping other tables read-only.
What happens if a client should no longer have access?
Remove or update their record in your Airtable Users table. Since authentication is tied to email matching, they will no longer be able to log in once their record is removed.

About the author
Matt Shepherd
Founder, CollabPortals
Matt is the founder of CollabPortals. A software engineer and Airtable power user who kept running into the same frustration: no easy way to give external users a simple and secure view to edit their data. He built CollabPortals as the lightweight solution to that problem, allowing you to set up a secure, permissioned portal in a few clicks.
Related use cases and guides
CRM
Give your clients a branded portal to view their account data, deals, contacts, sites, activity, directly from your Airtable CRM. No extra seats, no code.
Use caseProject Management
Give clients and external collaborators a branded view into their projects in Airtable, with controlled access to tasks, timelines, and deliverables.
ComparisonCollabPortals vs Airtable Portals: Third-Party Tool or Native Feature?
Compare CollabPortals ($10/month, unlimited users) with Airtable's native Portals, where read-only guests are free and editing guests are sold in packs from $120/month. See which fits how your users actually work.
ComparisonCollabPortals vs Softr: Lightweight Portal or Full App Builder?
Compare CollabPortals and Softr for Airtable portals. See how a $10/month focused portal tool stacks up against a full no-code app builder starting at $49/month.