Custom Domains
Serve your CollabPortals portal on your own domain like portal.acme.com, with an automatic TLS certificate. Available on a paid plan and during the free trial.
Overview
By default a portal lives on a CollabPortals URL like https://www.collabportals.com/your-portal-slug. A custom domain lets you serve the same portal on a domain you own, so end users see your address instead of ours:
https://portal.acme.com
The portal works exactly the same way. Only the address in the browser bar changes. CollabPortals provisions and renews the TLS certificate for the domain automatically, so it is served over HTTPS with no work from you.
Custom domains are available on any paid plan, and during the free trial, so you can set one up before you have paid anything. One custom domain per portal.
Setting Up a Custom Domain
You add a domain in the portal admin, then add one DNS record at whatever provider hosts your domain (your registrar, Cloudflare, Route 53, and so on).
- 1
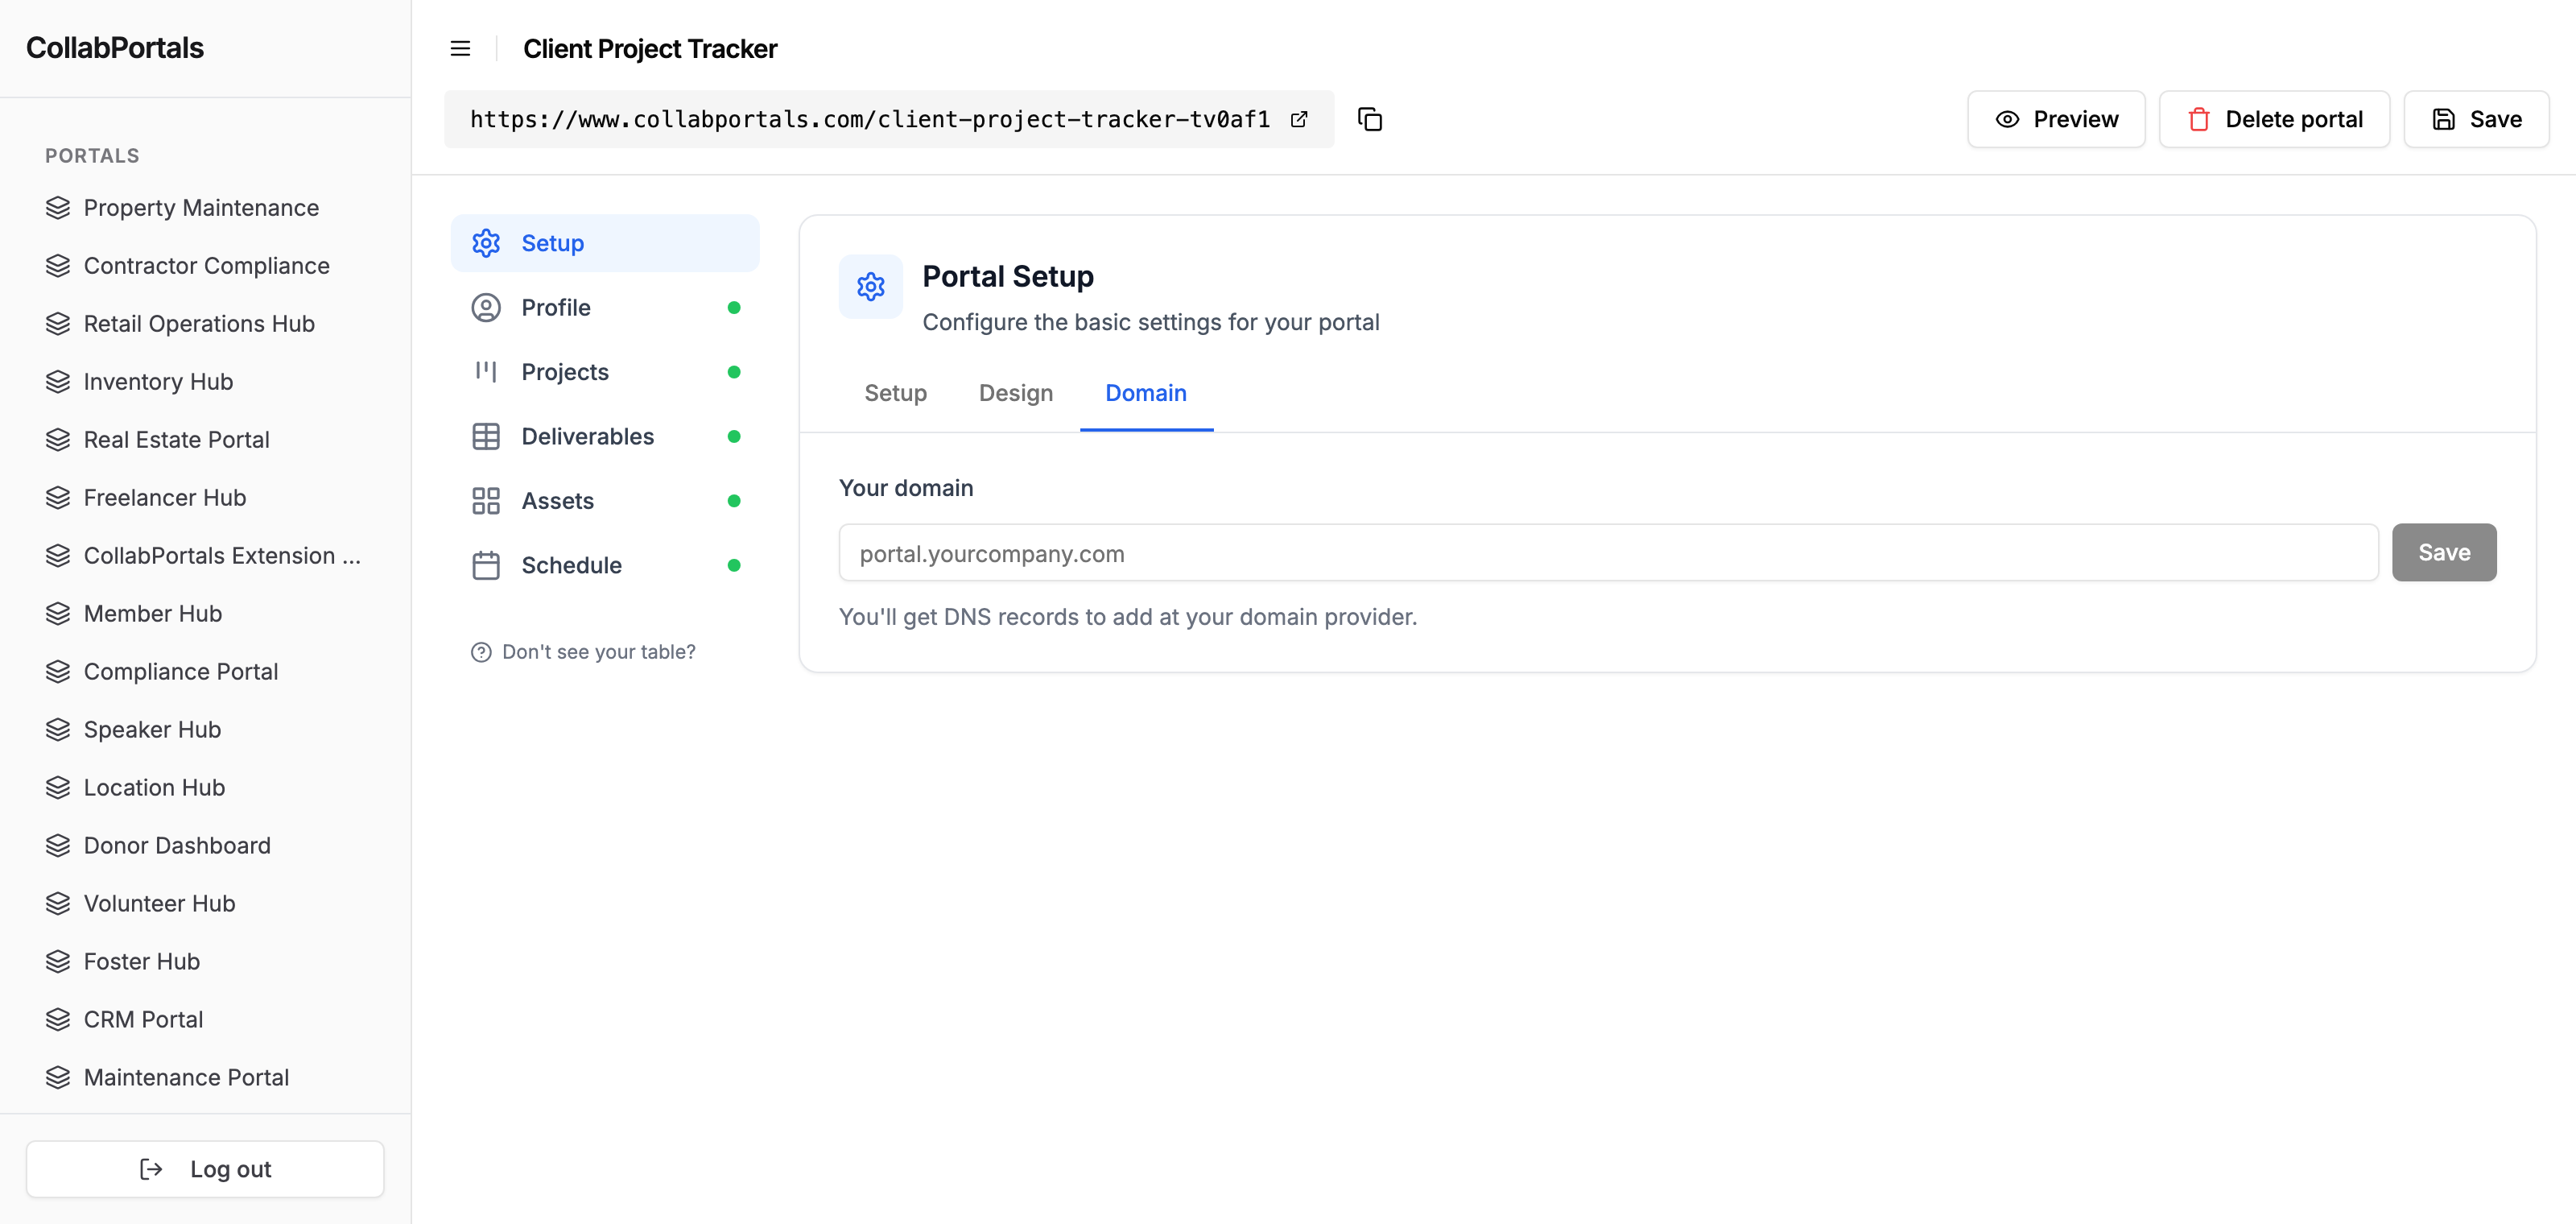
Open the Domain tab
From your admin dashboard, open the portal you want to put on a custom domain and switch to the Domain tab of its settings.
- 2
Enter your domain
Type the domain you want to use, for example
portal.acme.com, and save. Use a subdomain you control. Do not use a CollabPortals domain. - 3
Add the DNS record
The Domain tab shows the exact record to add at your DNS provider. For a subdomain like
portal.acme.comit is a singleCNAME. Add it at your provider and save it there. - 4
Wait for verification
Once your DNS record is live, CollabPortals verifies the domain and issues a TLS certificate for it. This usually takes a few minutes. The status in the Domain tab moves from "Waiting on DNS" to "Live", and the portal starts serving on your domain.
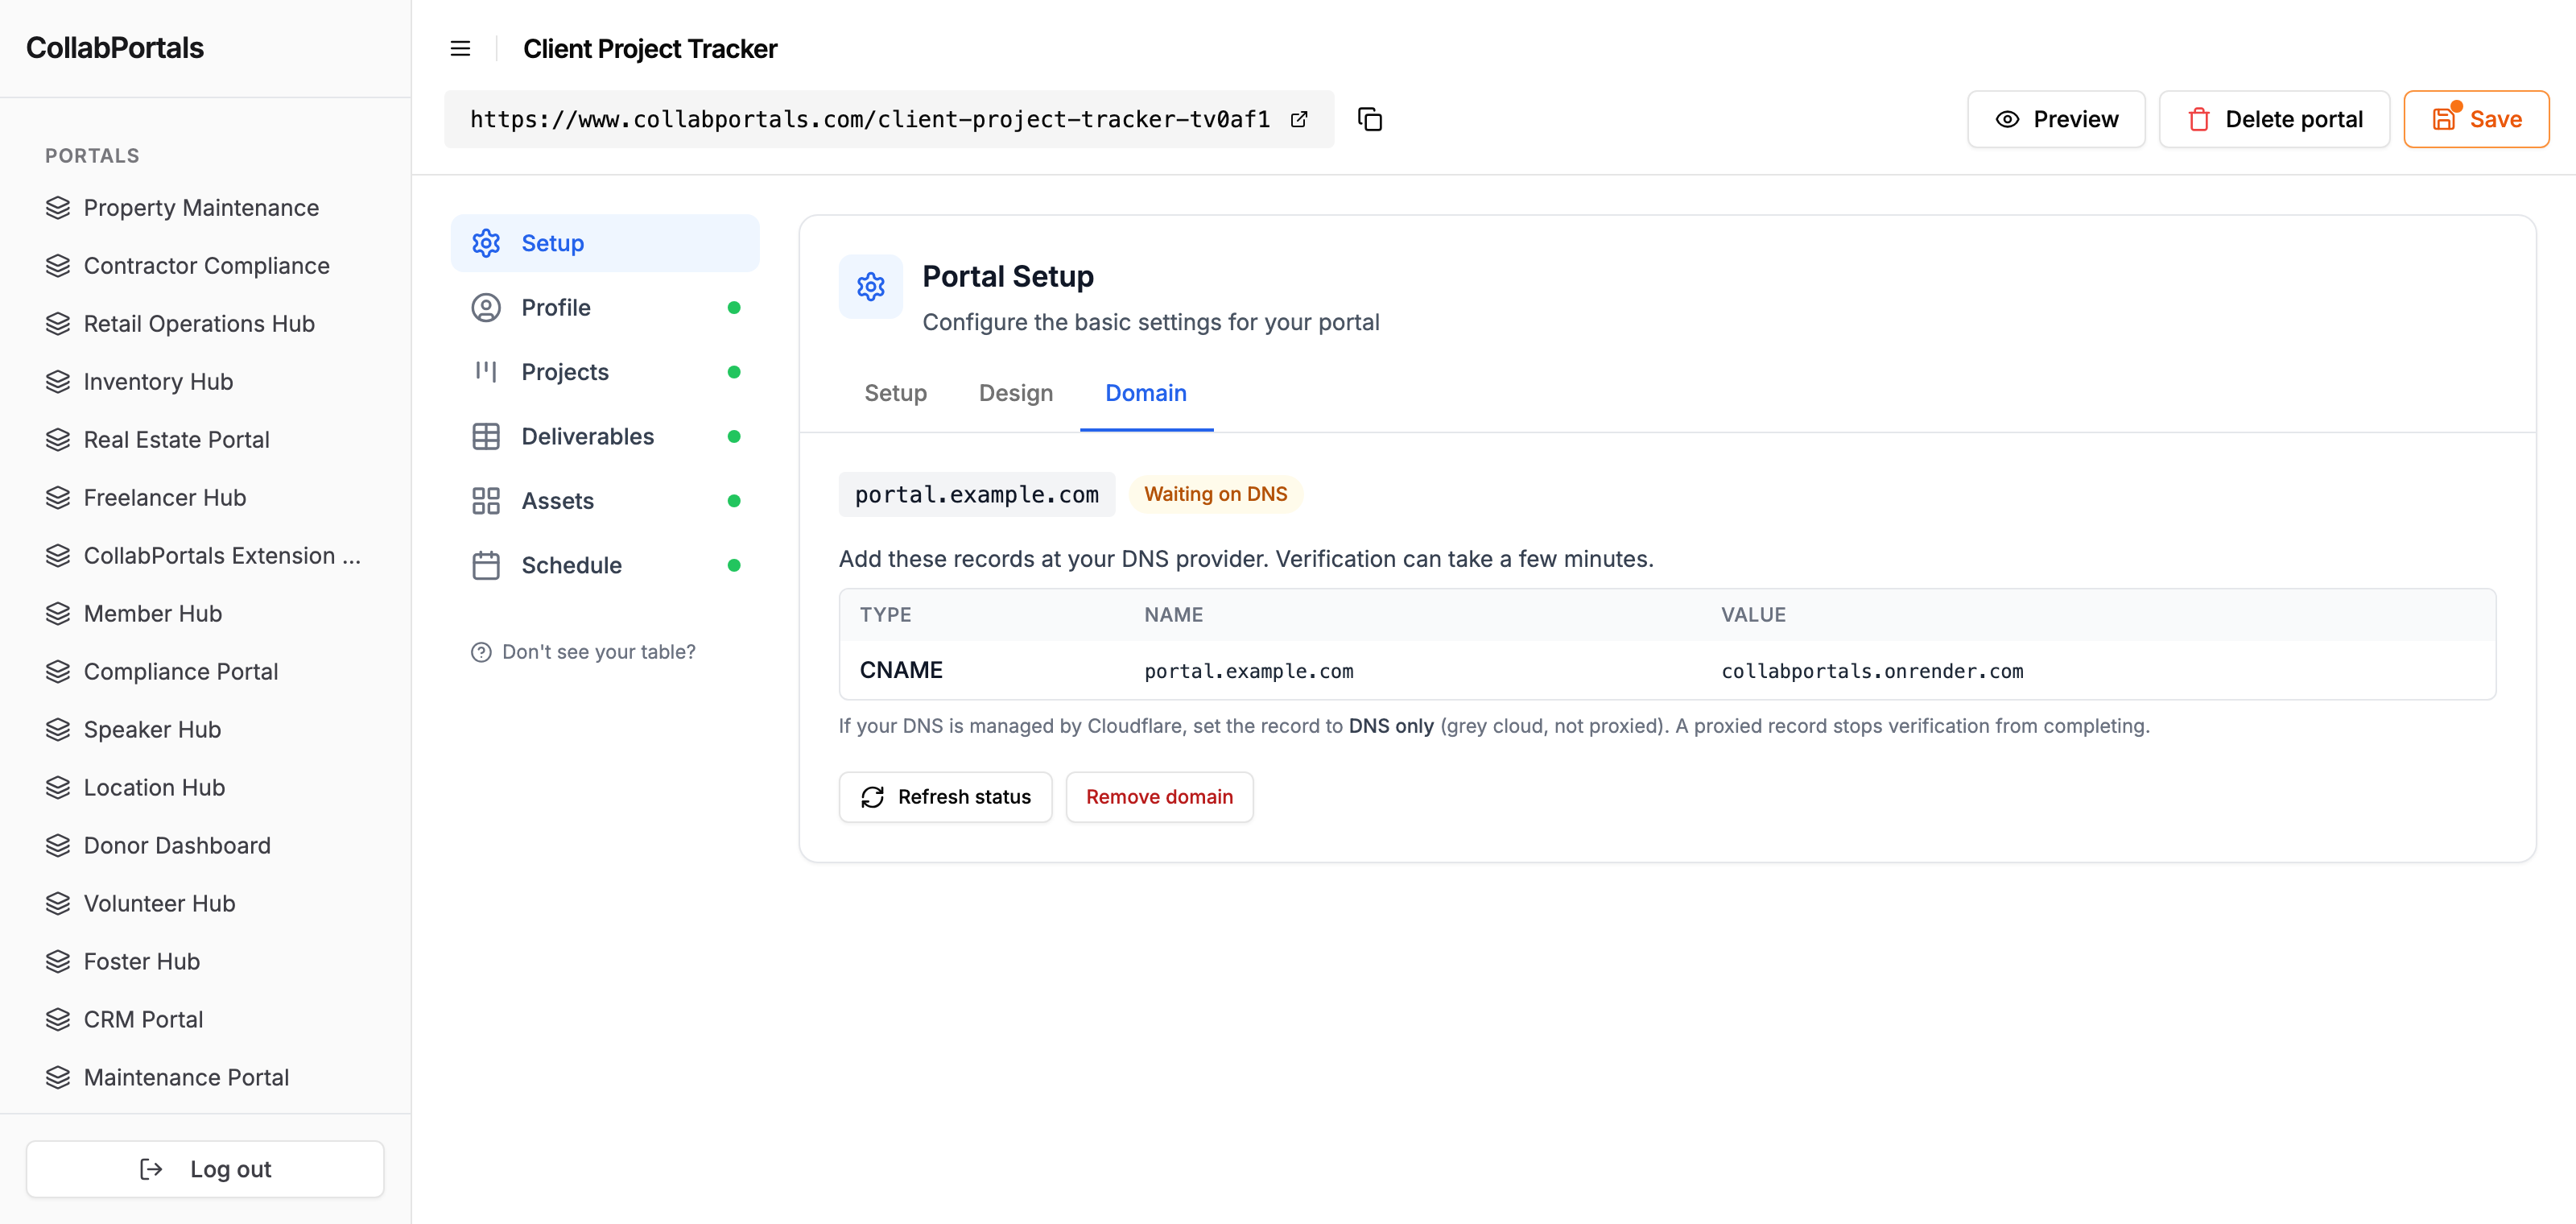
If your DNS is managed by Cloudflare, set the record to DNS only (the grey cloud, not the orange "Proxied" cloud). A proxied record stops the domain from verifying.
Subdomain or Root Domain
A subdomain such as portal.acme.com or members.acme.com is the simple case. It uses a single CNAME record, and most teams use a subdomain so their main website keeps the root domain.
A root domain (also called an apex, like acme.com with no subdomain) is also supported, but root domains cannot use a CNAME. Your DNS provider needs to support ALIAS or ANAME records, which not all providers do. If yours does not, use a subdomain instead. The Domain tab shows the right record type for the domain you entered.
How It Appears
Once the domain is live:
- The portal is served on your domain, and the address stays on your domain as users move around it. CollabPortals does not redirect it back to a
collabportals.comURL. - In the admin dashboard, the portal's URL shown at the top of its settings is your custom domain, and the Preview button opens the portal on your domain.
- End users log in the same way as on a CollabPortals URL. The email verification flow is unchanged.
The portal's CollabPortals URL keeps working too, so any links you already shared still resolve.
Changing or Removing a Domain
To remove a domain, use Remove domain, and the portal goes back to serving on its CollabPortals URL.
Changing a domain is the same thing in two steps: remove the old one first, then enter the new one. The domain box only appears when the portal has no domain set, so there is nothing to type over while one is live.
Next Steps
- Portal Branding - Logo, theme colors, and favicon so the whole portal carries your brand
- Sharing Your Portal - How end users log in and first see your portal
- Billing and Subscription - Custom domains are included on any paid plan and in the trial